Custom Views in Vryno CRM
What are Custom Views?
In Vryno CRM, custom views refer to personalized and user-defined views within different modules of the CRM system. A module in Vryno CRM represents a specific category of data, such as Contacts, Leads, Deals, Tasks, Cases, etc. Each module typically comes with default views that display data in predefined ways, but custom views allow users to create their own views tailored to their specific needs and preferences.
Custom views offer several benefits, including:
Data Visibility: Users can define which fields and information they want to see in their custom views, allowing them to focus on the most relevant data for their workflows.
Data Organization: Custom views can be designed to display data in a particular order or arrangement that suits the user's workflow, making it easier to navigate and access critical information quickly.
Filtering and Sorting: Users can apply filters and sorting options to customize how data is presented, enabling them to view specific subsets of records that meet certain criteria.
Personalization: Custom views enable each user to create views that suit their individual preferences and work processes, enhancing user experience and productivity.
Saved Preferences: Once created, custom views can be saved for future use, saving time and effort when accessing frequently used data configurations.
For example, in the Contacts module, a sales representative might create a custom view that displays only high-priority leads from specific industries, sorted by the last contact date. This custom view helps the sales representative focus on the most important leads and prioritize follow-up activities effectively.
In the Deals module, a sales manager might create a custom view that displays deals with a high potential value, sorted by the expected close date. This custom view allows the sales manager to identify key opportunities that require attention and track progress toward meeting sales targets.
Custom views in Vryno CRM empower users to tailor their CRM experience, providing them with the flexibility and control to work efficiently and make informed decisions based on the data that matters most to their specific roles and responsibilities.
How to Create Custom Views in Vryno CRM?
Step 1: Login to your Vryno CRM account
-51f15d4e34dfd0c0734f76682923f25b.png)
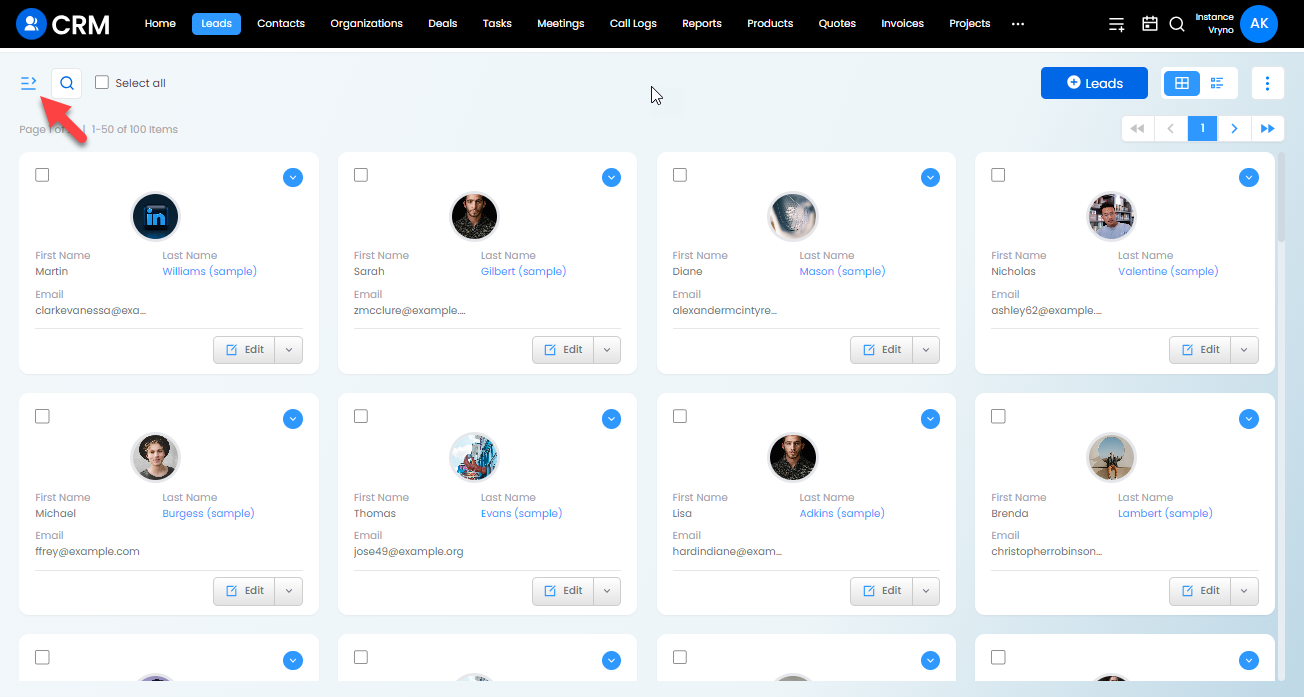
Step 2: Navigate to the module where you want to create a Custom View

Step 3: Click on the three lines on the top left corner to access custom views
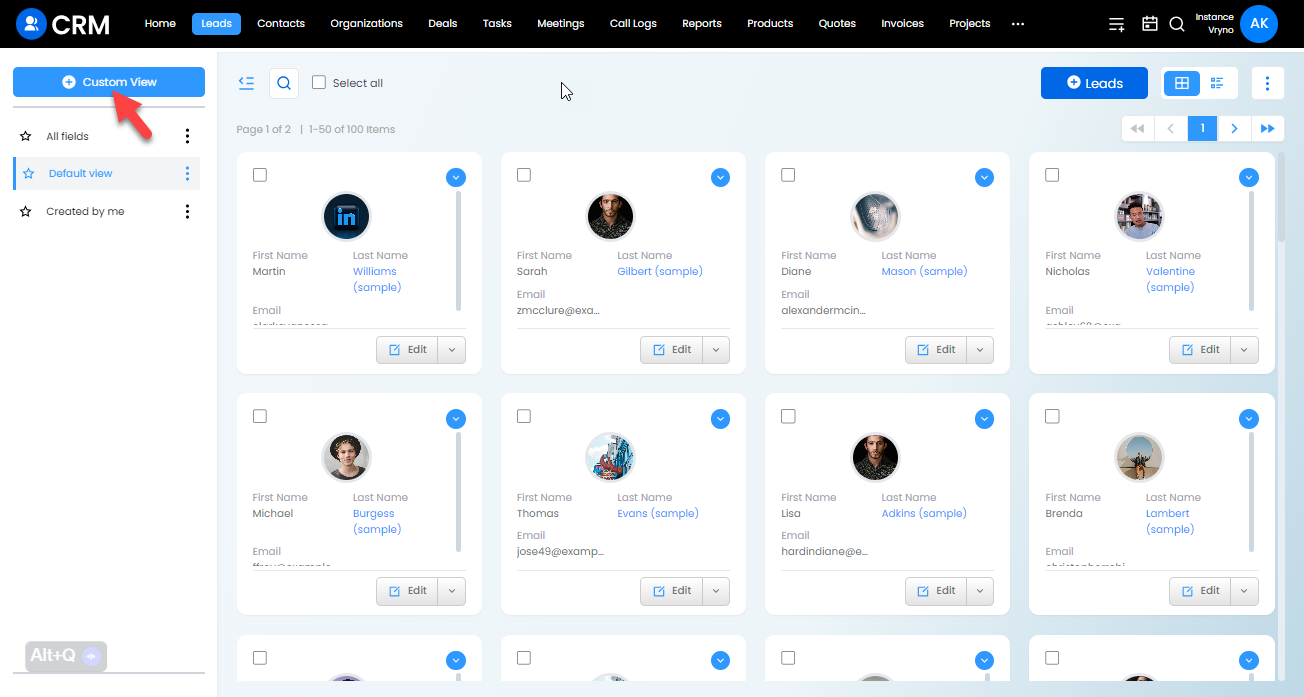
Step 4: Click on the + Custom View Button
Step 5: Give the Custom View a name
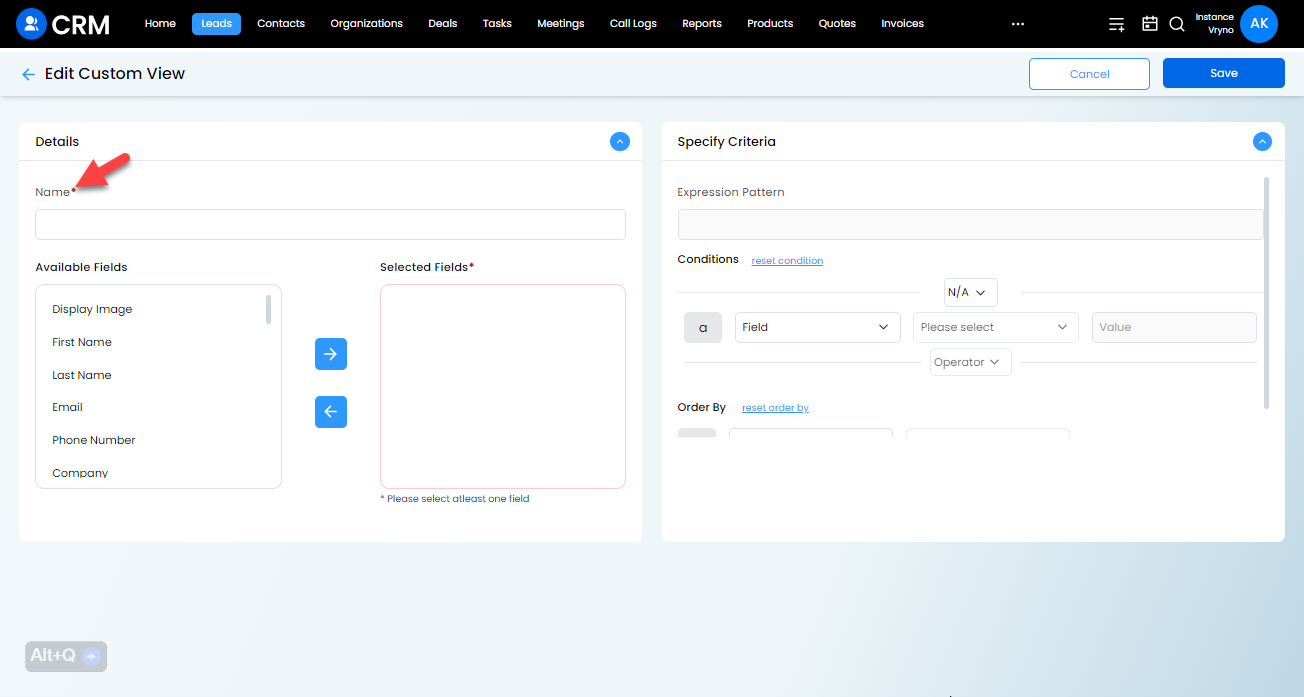
Step 6: Select fields by clicking on them from the Available Fields section and then click on the arrow pointing towards to Selected Fields section to select them
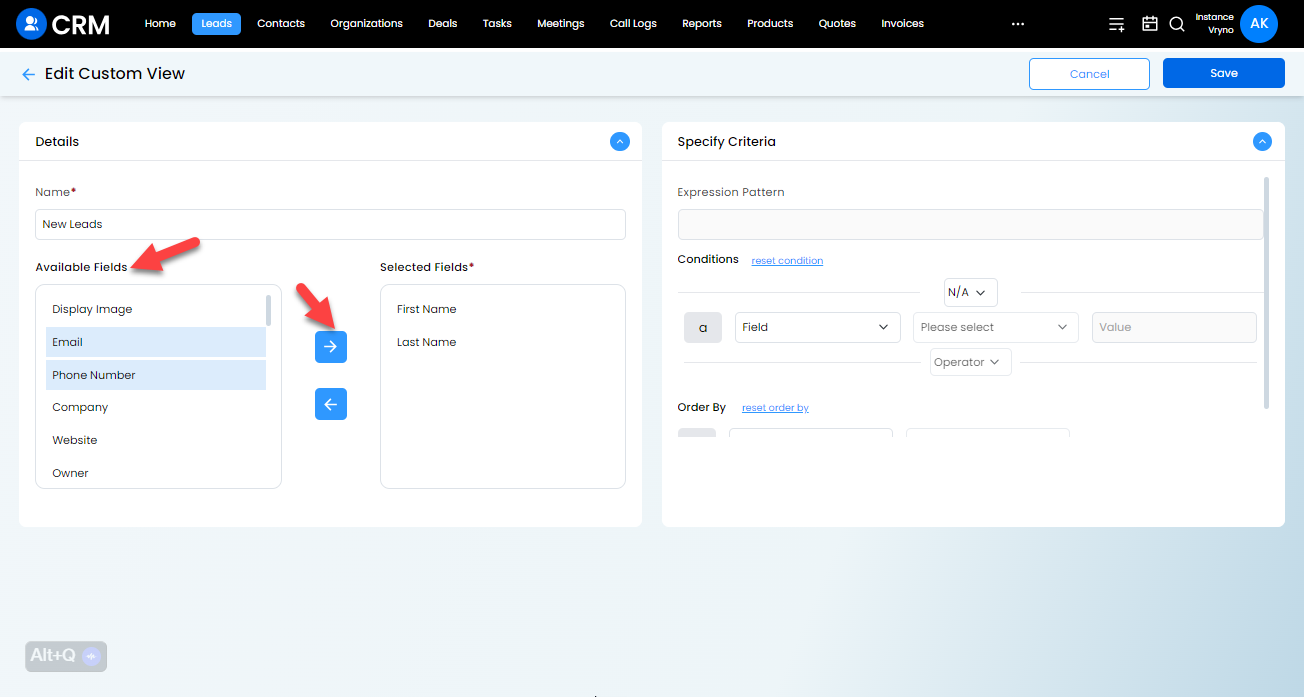
Step 7: On the right hand side where the system asks you to Specify Criteria, select the conditions based on the data you would like to see
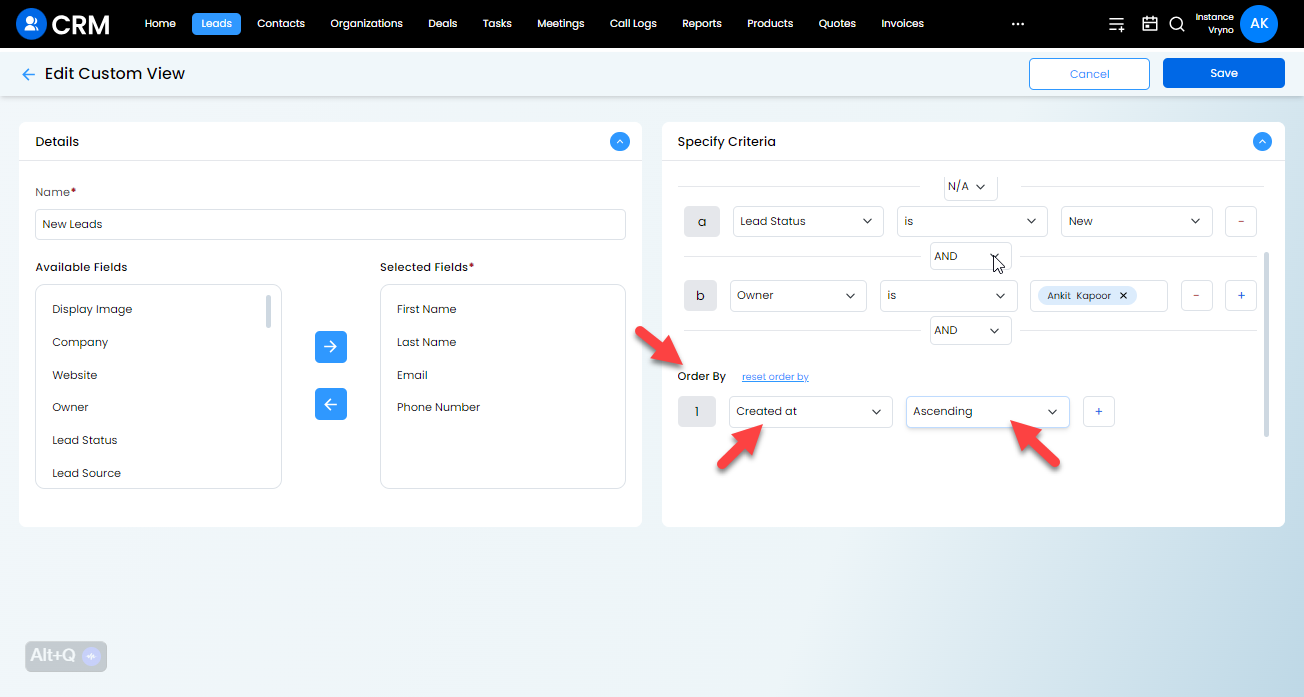
Eg: Here in the image below, I want to see all the Leads of mine that have their status set to "New". Therefore, the conditions I added include: a. Condition 1: Lead Status (Field) + is (Operator) + New (Field Response) b. Next I clicked on the + button next to the first condition and chose AND as the relationship betweem my first condition & the second condition I'm about to setup c. Condition 2: Owner (Field) + is (Operator) + Ankit Kapoor (Field Response)

Step 8: At the bottom you would see another section named Order By that lets you select how you wish to sort your data
Eg: Here in the image below, I want to see the most recently created first, therefore I chose "Created At" as the Order By Field and in the dropdown next to it, I chose Ascending
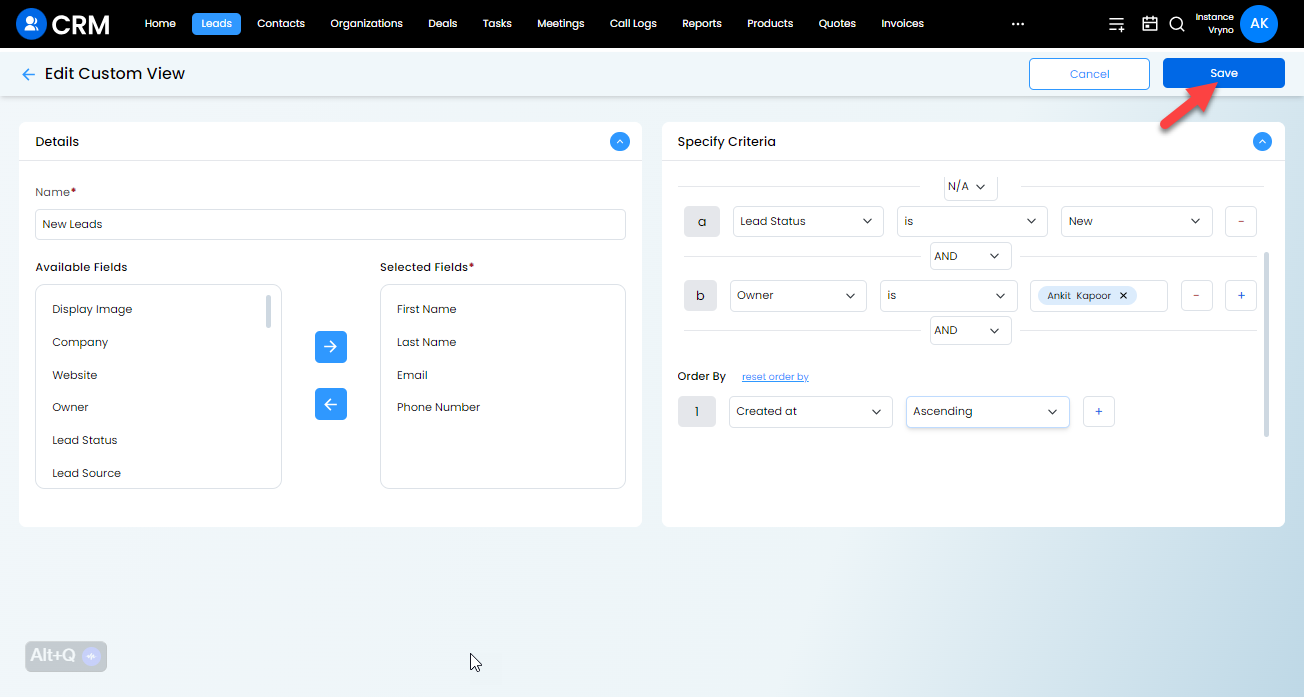
Step 9: Click on Save
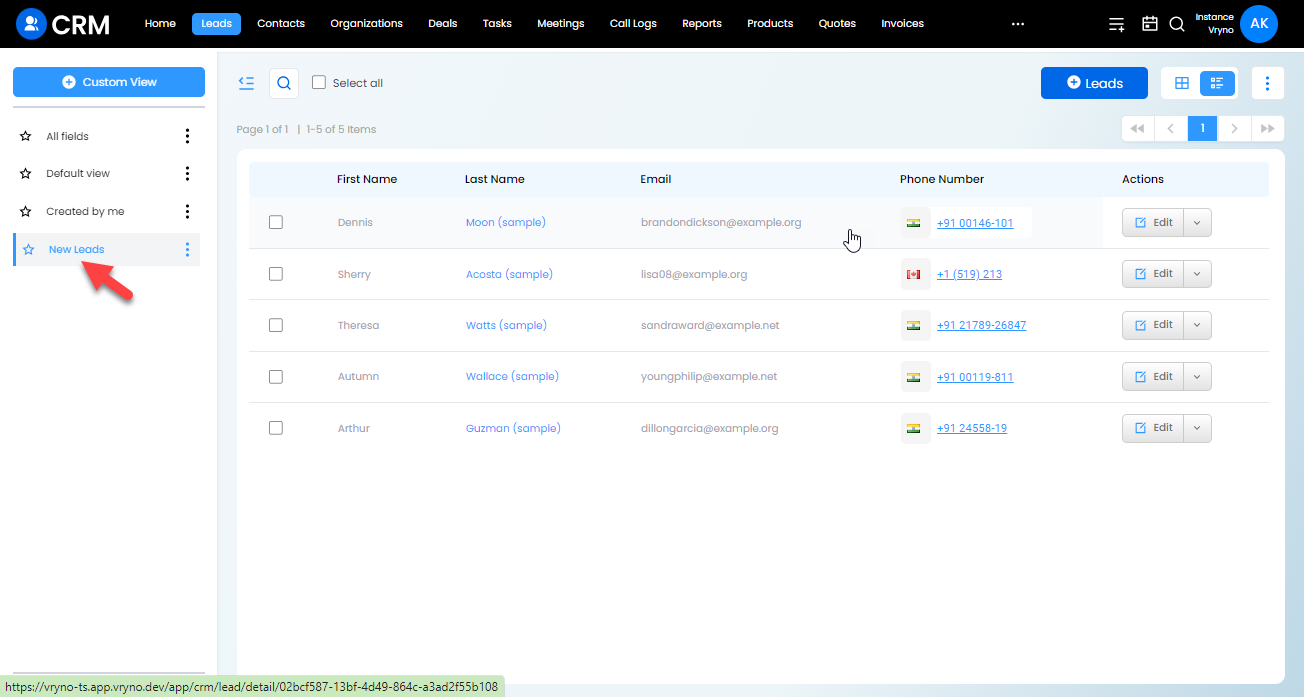
Congratulations! You've managed to create your first custom view
How to mark an existing custom view as default
Step 1: Login to your Vryno CRM account
Step 2: Navigate to the module where you want to create a Custom View
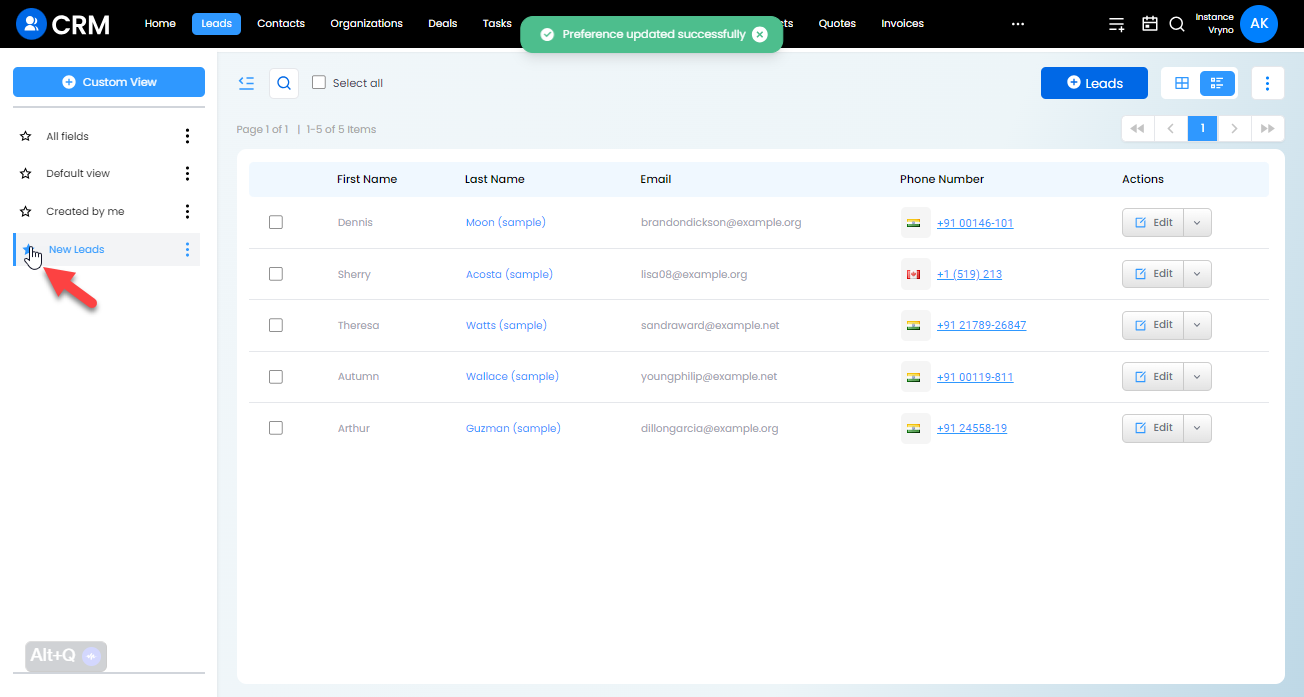
Step 3: Click on the three lines on the top left corner to access custom views
Step 4: Click on the Star icon next to the custom view you wish to mark as the default custom view
How to Edit an existing custom view
Step 1: Login to your Vryno CRM account
Step 2: Navigate to the module where you want to create a Custom View
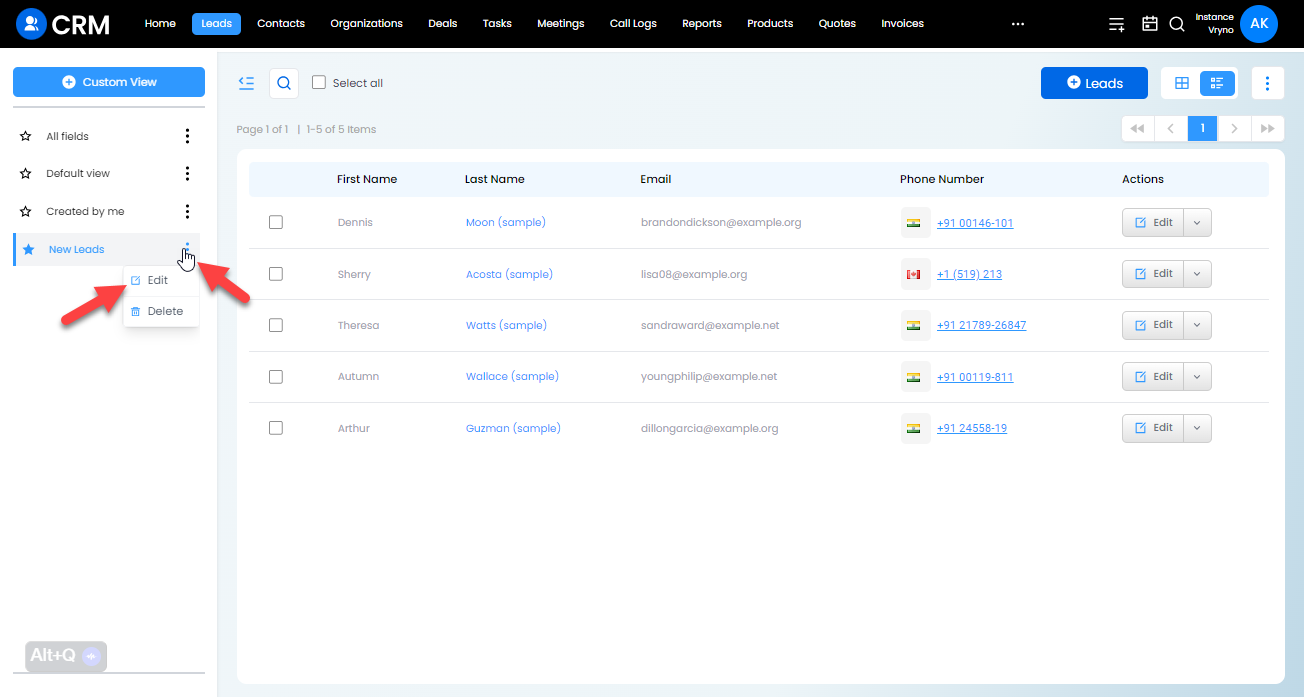
Step 3: Click on the three lines on the top left corner to access custom views
Step 4: Click on the three dots next to the custom view and click on Edit
Step 5: Make the required changes & click on Save
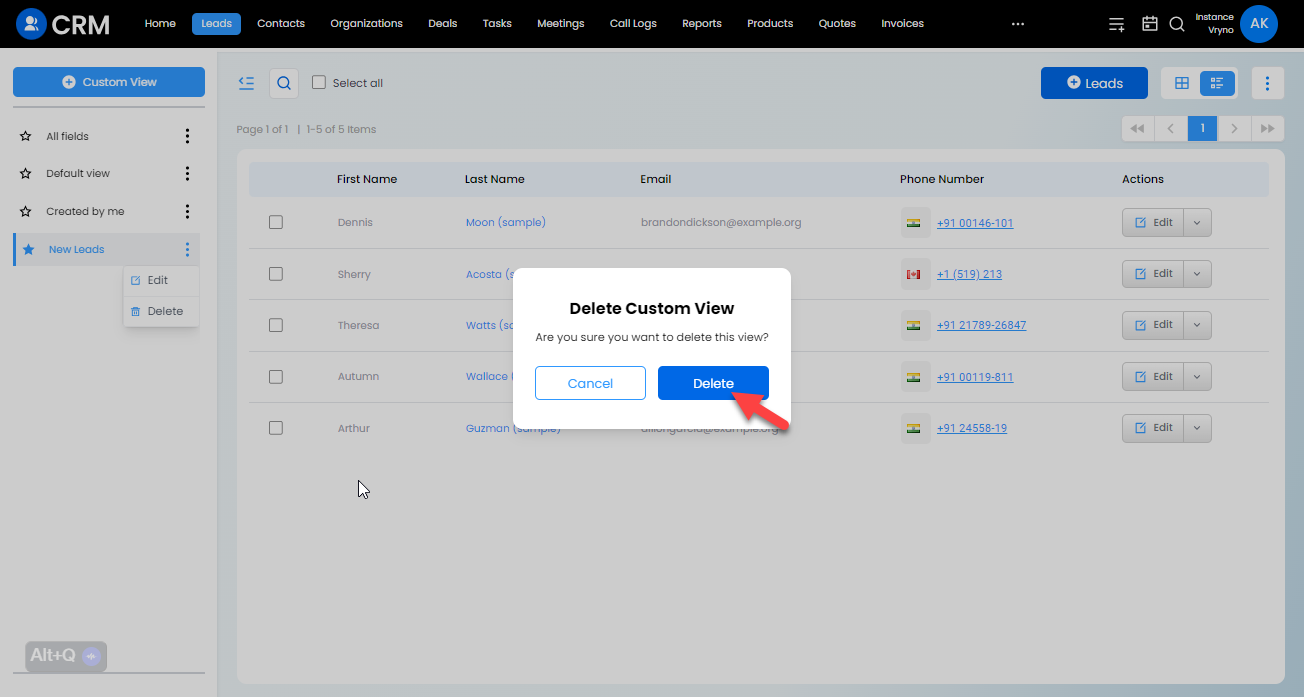
How to Delete an existing Custom View
Step 1: Login to your Vryno CRM account
Step 2: Navigate to the module where you want to create a Custom View
Step 3: Click on the three lines on the top left corner to access custom views
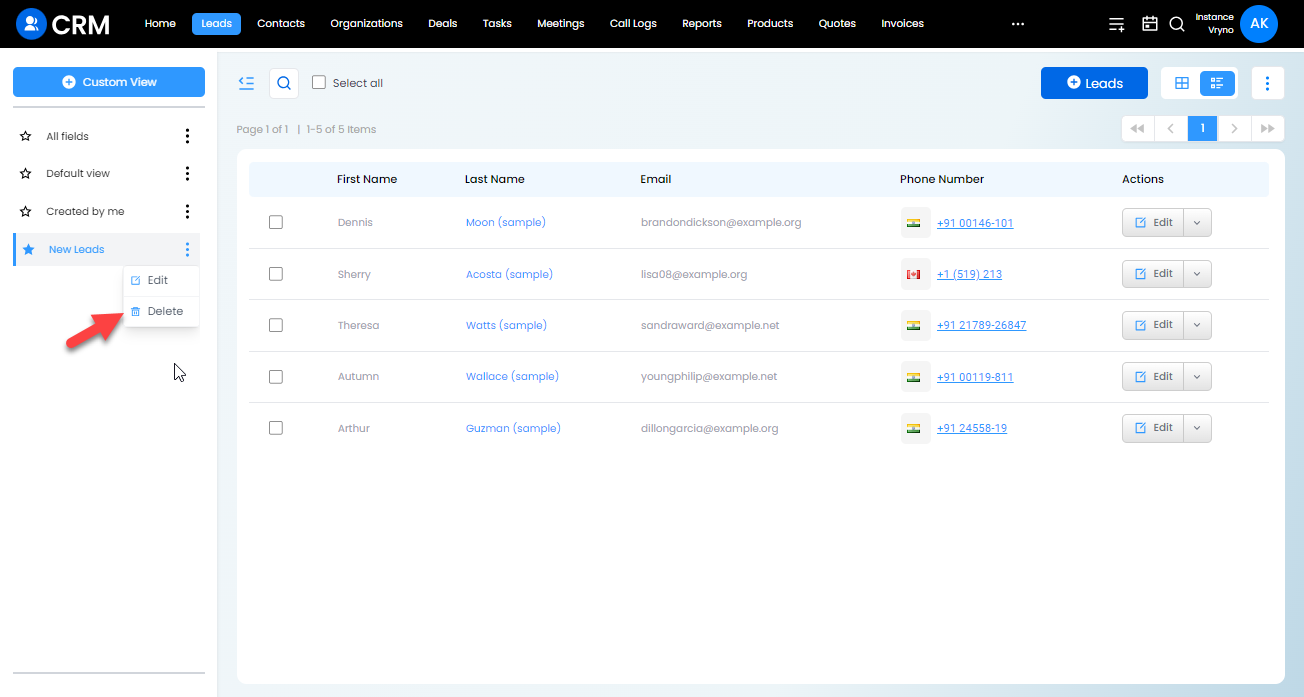
Step 4: Click on the three dots next to the custom view and click on Delete
Step 5: Click on Delete in the box that pops up to confirm deletion of the chosen custom view