Workflows & Actions in Vryno CRM
In Vryno CRM, workflows are automated sequences of actions that are triggered by specific events or conditions. These workflows help streamline and automate various business processes, saving time and reducing manual effort. Workflows in CRM systems typically involve the following components:
Trigger: A specific event or condition that initiates the workflow. Common triggers include the creation or modification of records, such as leads, opportunities, or cases.
Conditions: Criteria that must be met for the workflow to proceed. Workflows can include if-then statements, where certain actions are taken only if specific conditions are satisfied.
Actions: The tasks or actions performed when the workflow is triggered and the conditions are met. Actions can include sending email notifications, updating field values, assigning tasks to users, creating new records, or even calling external services.
Some common examples of workflows in a CRM system include:
a. Sending an automatic welcome email to new leads when they are added to the system.
b. Automatically assigning new opportunities to sales representatives based on predefined criteria.
c. Sending follow-up reminders for tasks or meetings associated with a customer case.
d. Changing the status of an opportunity to "Closed-Won" when a deal is successfully closed.
How to create Workflows in Vryno CRM?
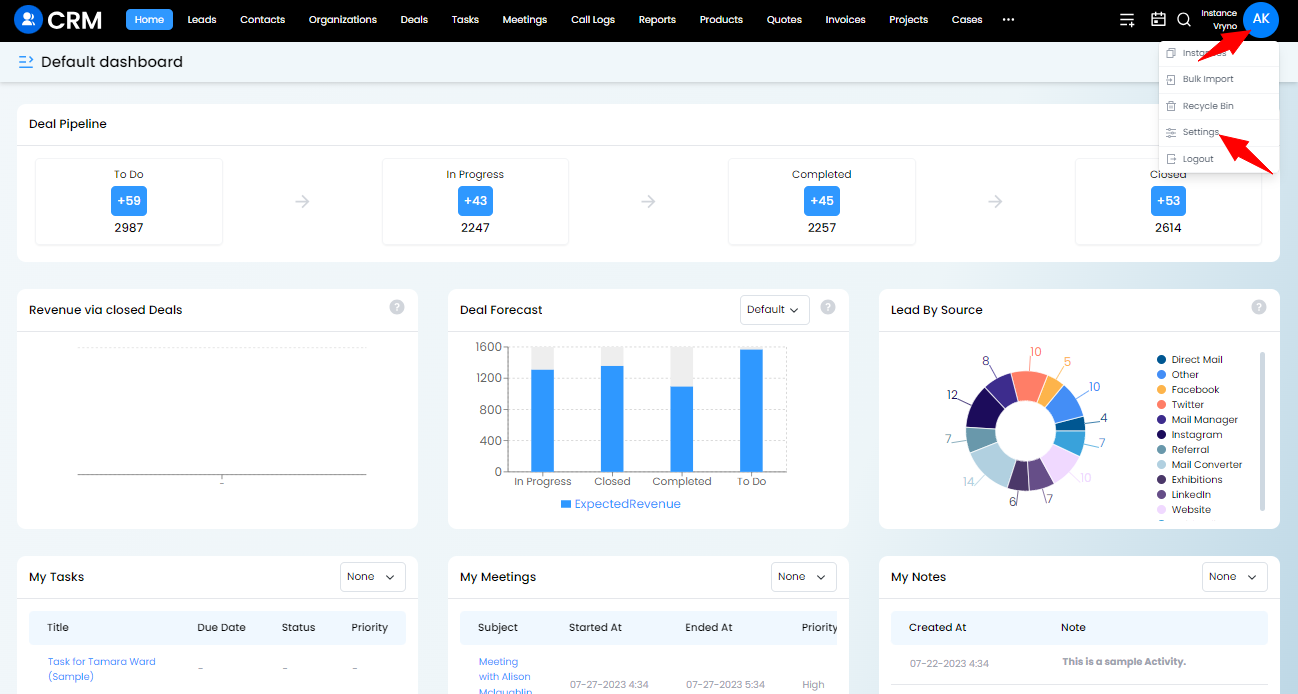
Step 1: Login to your Vryno CRM account
-51f15d4e34dfd0c0734f76682923f25b.png)
Step 2: Click on your Profile and access Settings
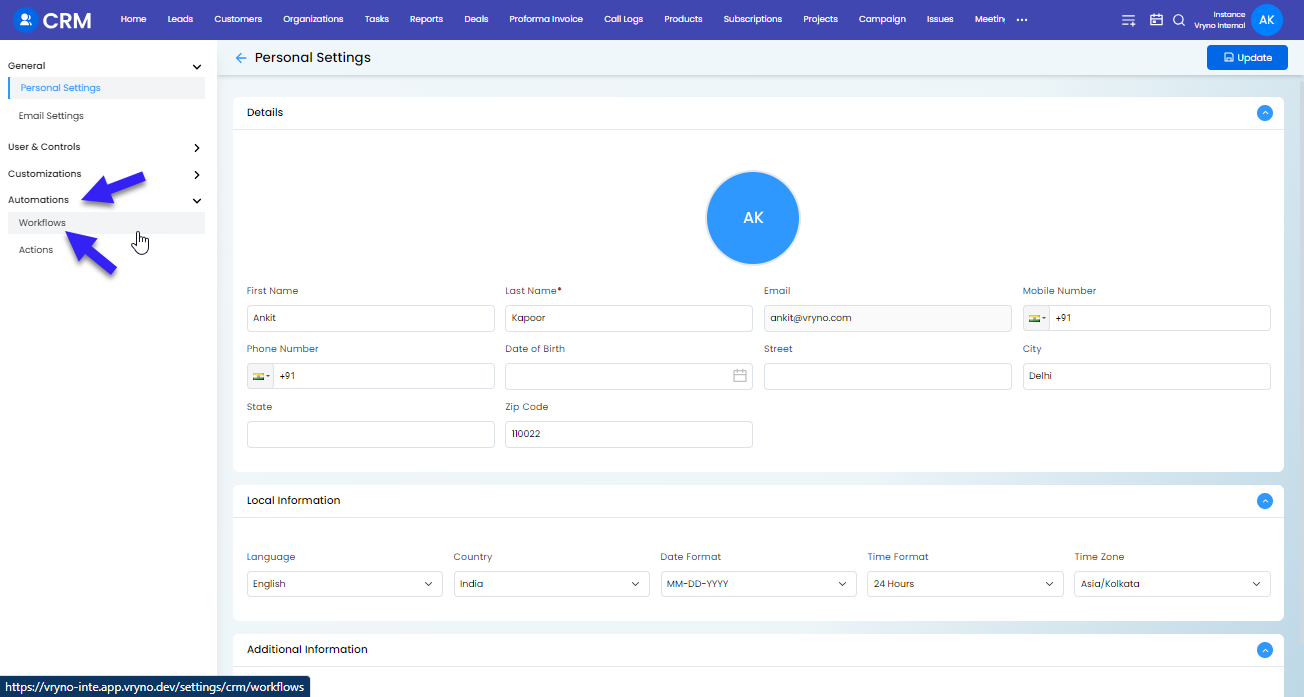
Step 3: Access Automations & Click on Workflows
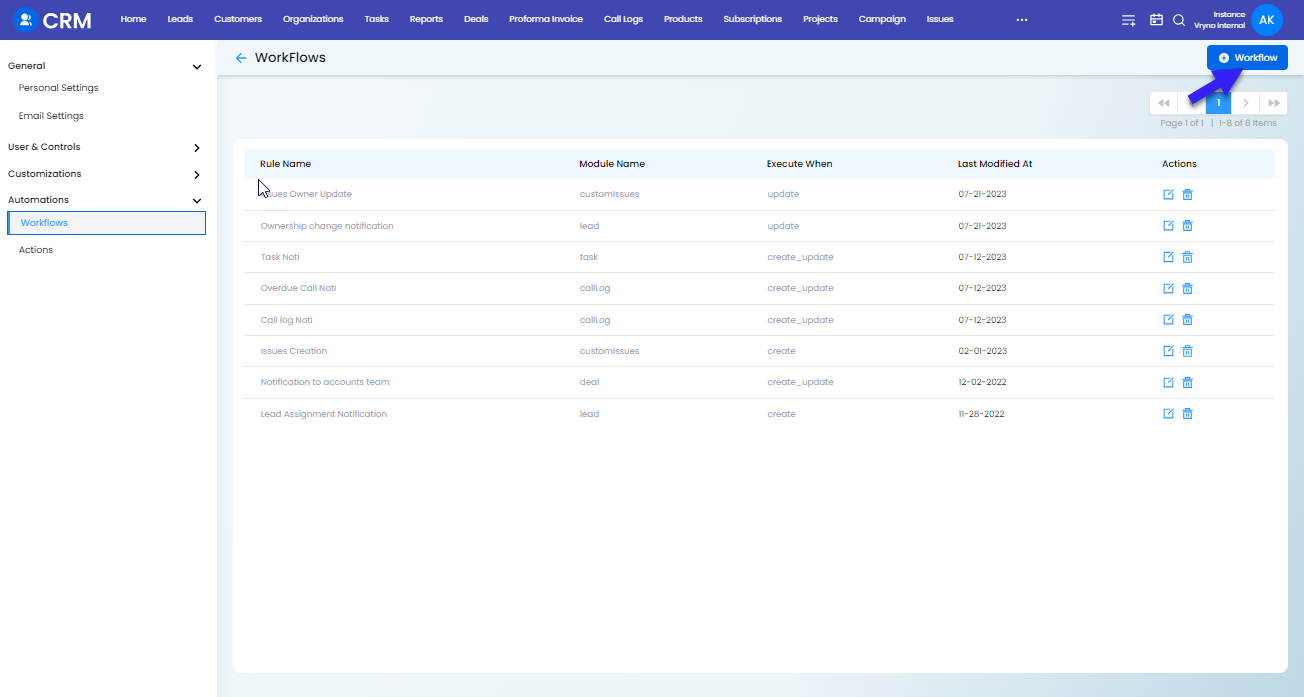
Step 4: Click on + Workflow on the top right hand corner
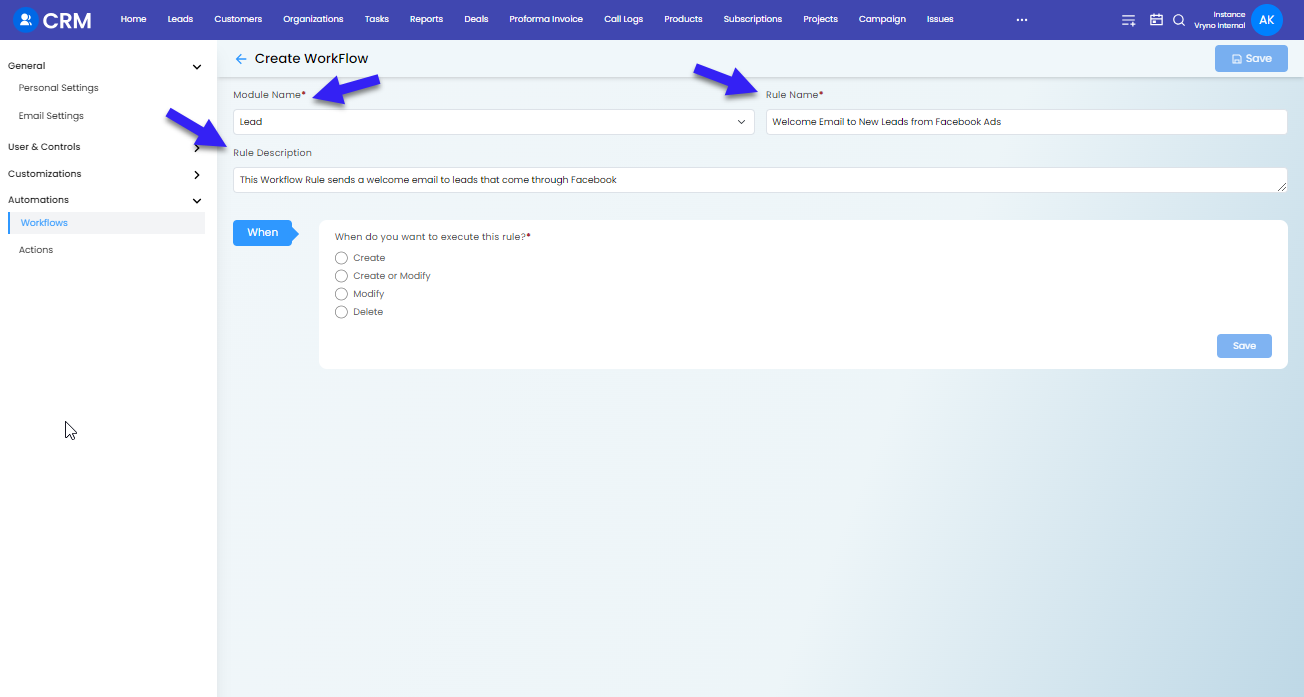
Step 5: In the next step, you need to associate a Module, Name & Description to the workflow you're creating
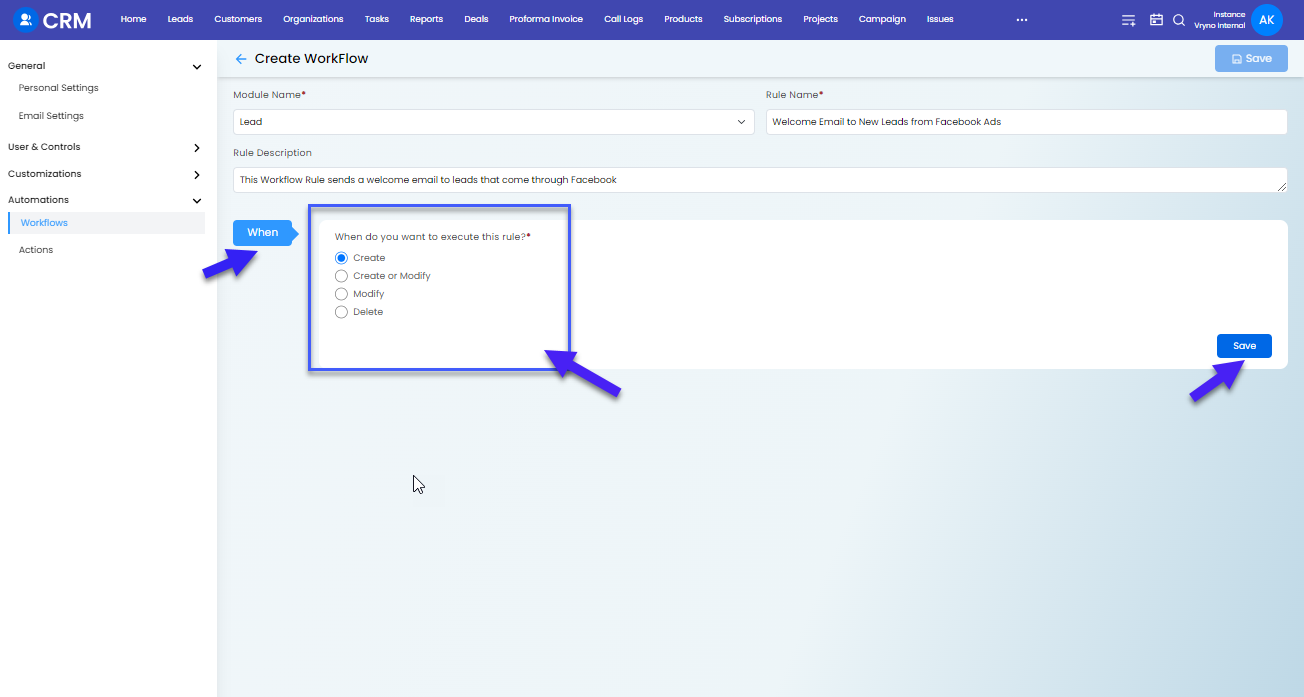
Step 6: Choose the When condition and Click on Save. Available options include:
a. Create: Workflow Rule will be executed whenever a new record is created in the associated module b. Create & Modify: Workflow Rule will be executed whenever a new record is created, or an existing record is modified in the associated module c. Modify: Workflow Rule will be executed when an existing record is modified in the associated module d. Delete: Workflow Rule will be executed whenever an existing record is deleted in the associated module
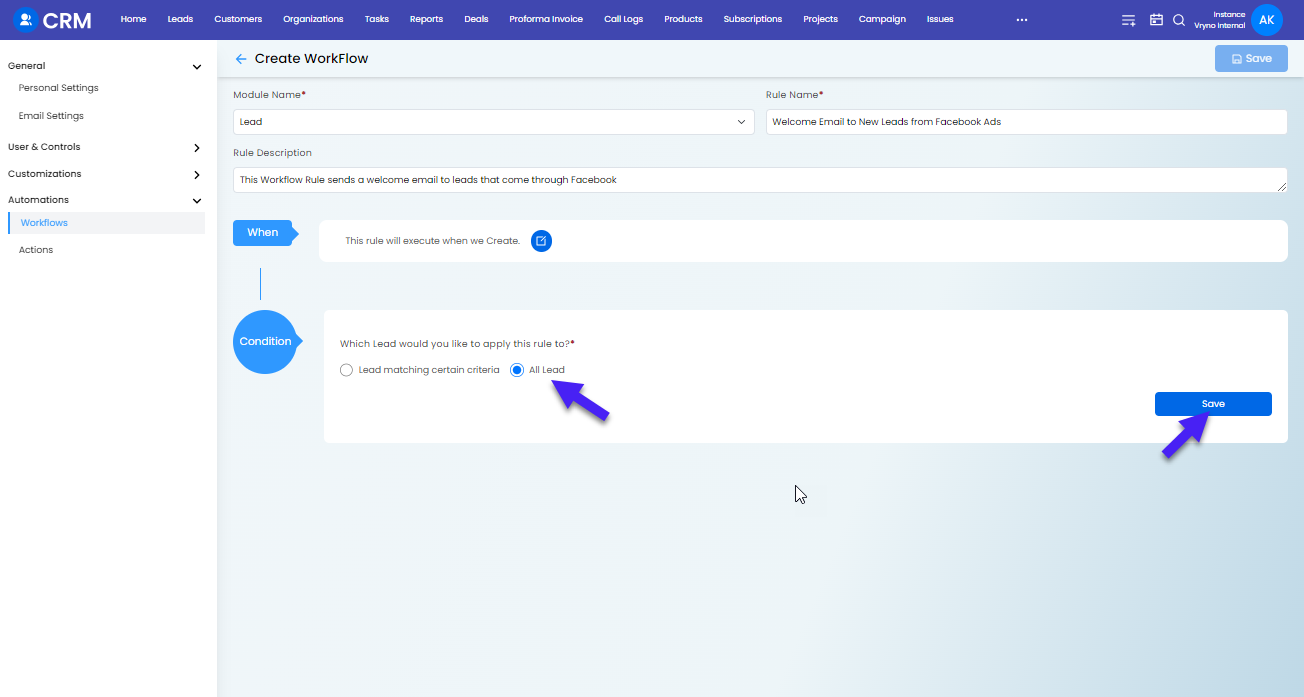
Step 7: Setup and associate the conditions with the Workflow Rule
a. If you don't want to associate any conditions and need the rule to be executed on all records, choose All Lead and then click on Save
OR
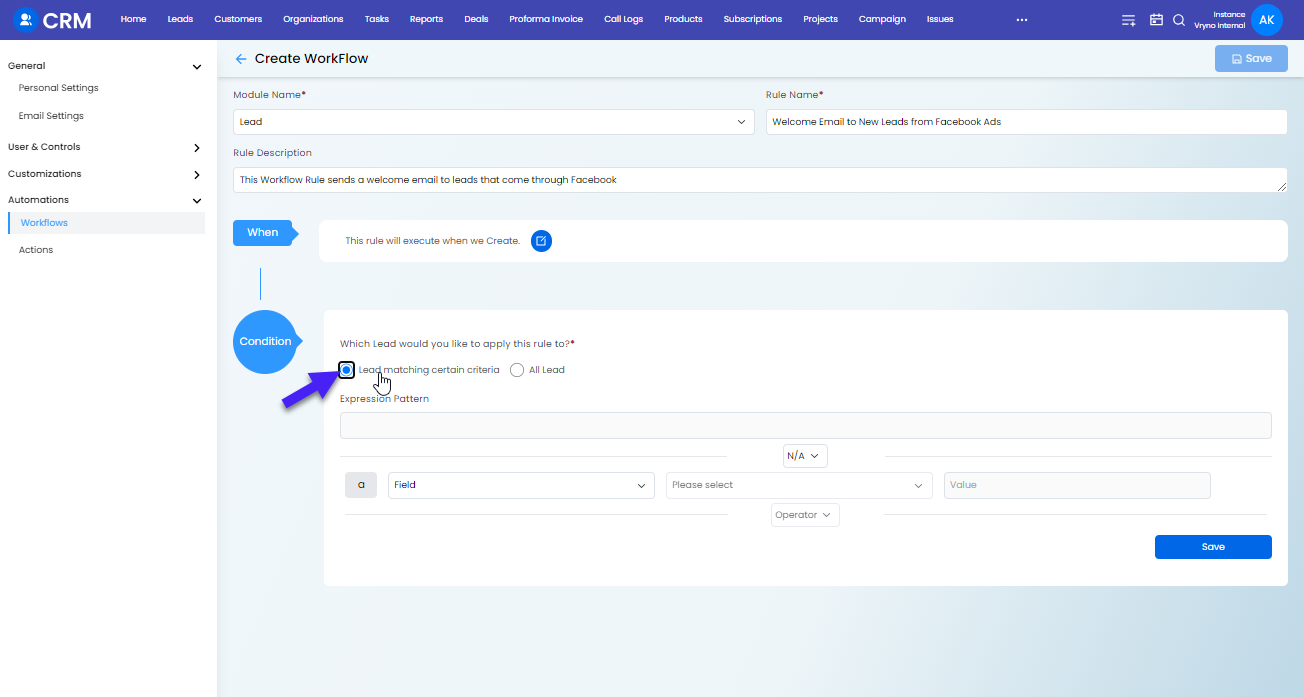
b. If you wish to associate conditions with the workflow rule, follow these steps:
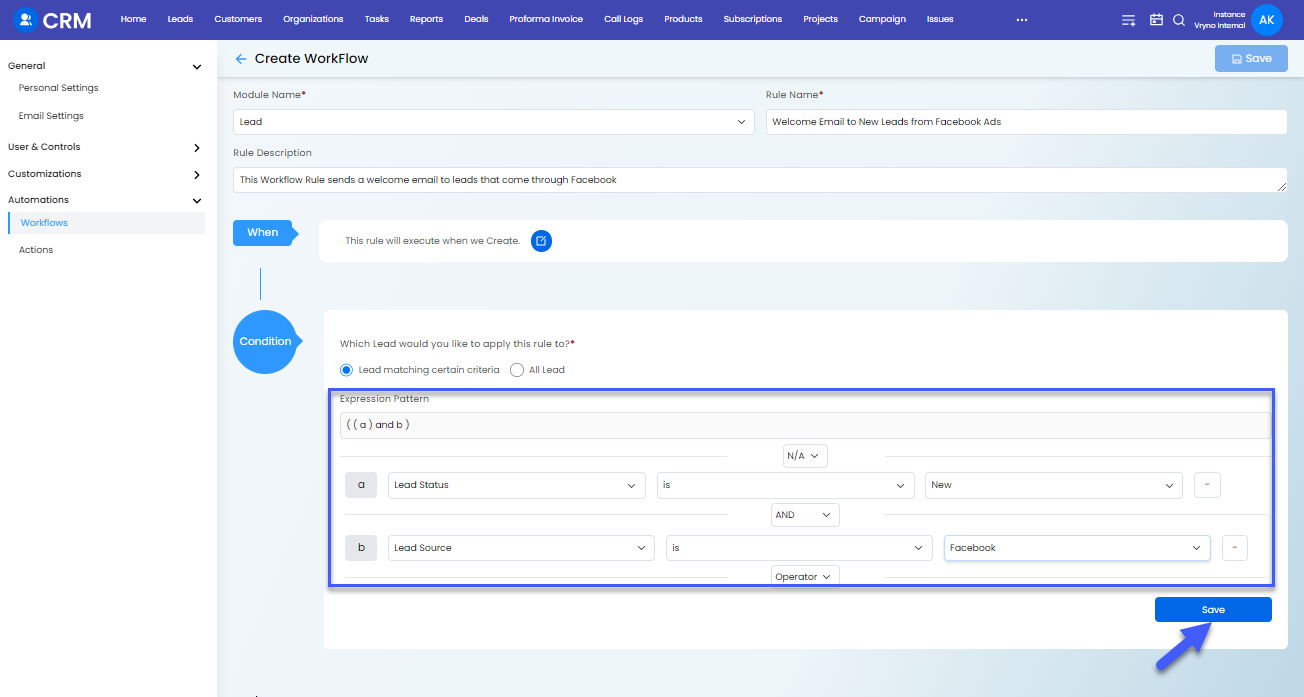
- Click on Lead Matching Certain Criteria
- Setup the Conditions & Click on Save
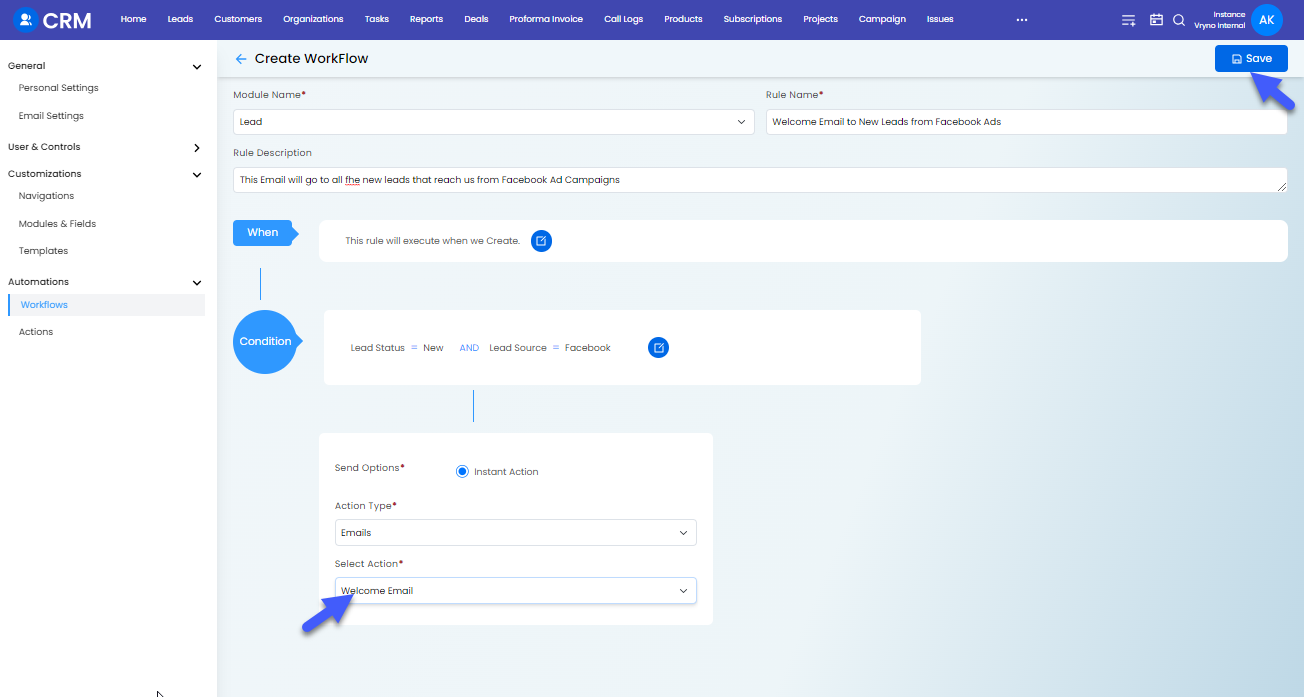
Step 8: Choose the Action Type to be associated with the workflow. Options include Email & Webhooks
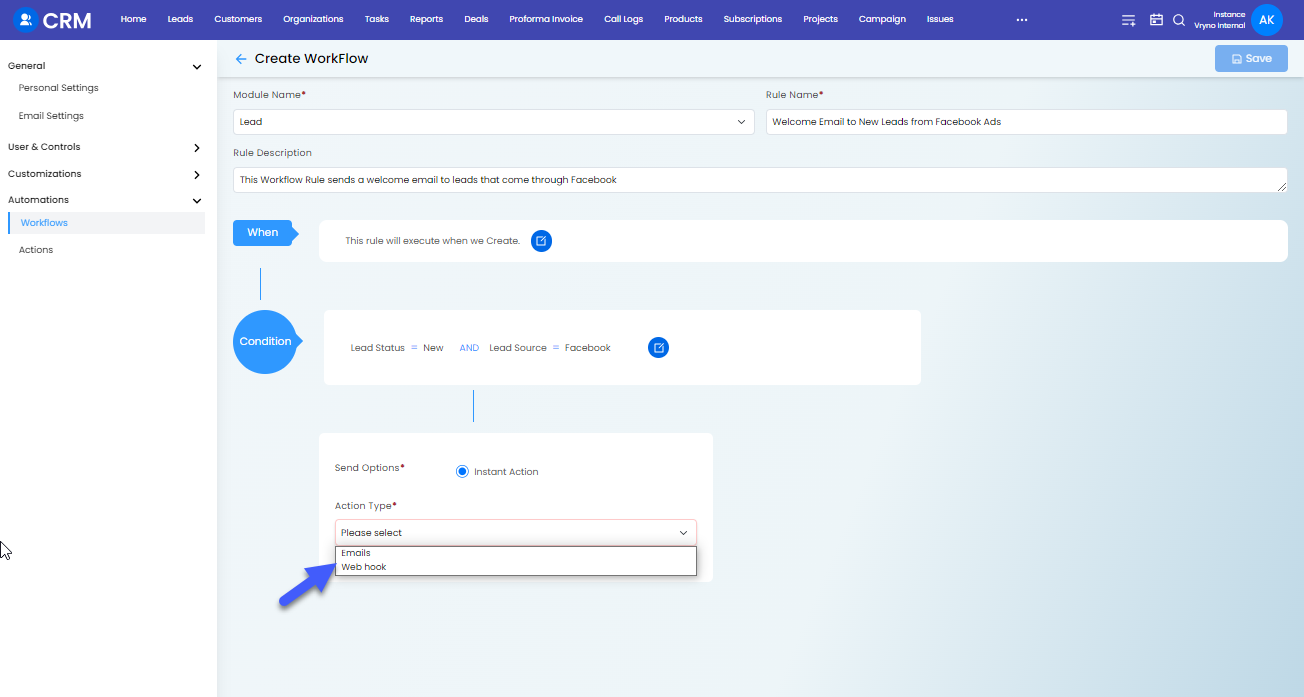
Step 9: Select the Action and Click on Save
How to Edit Workflows in Vryno CRM?
Step 1: Login to your Vryno CRM account
Step 2: Click on your Profile and access Settings
Step 3: Access Automations & Click on Workflows
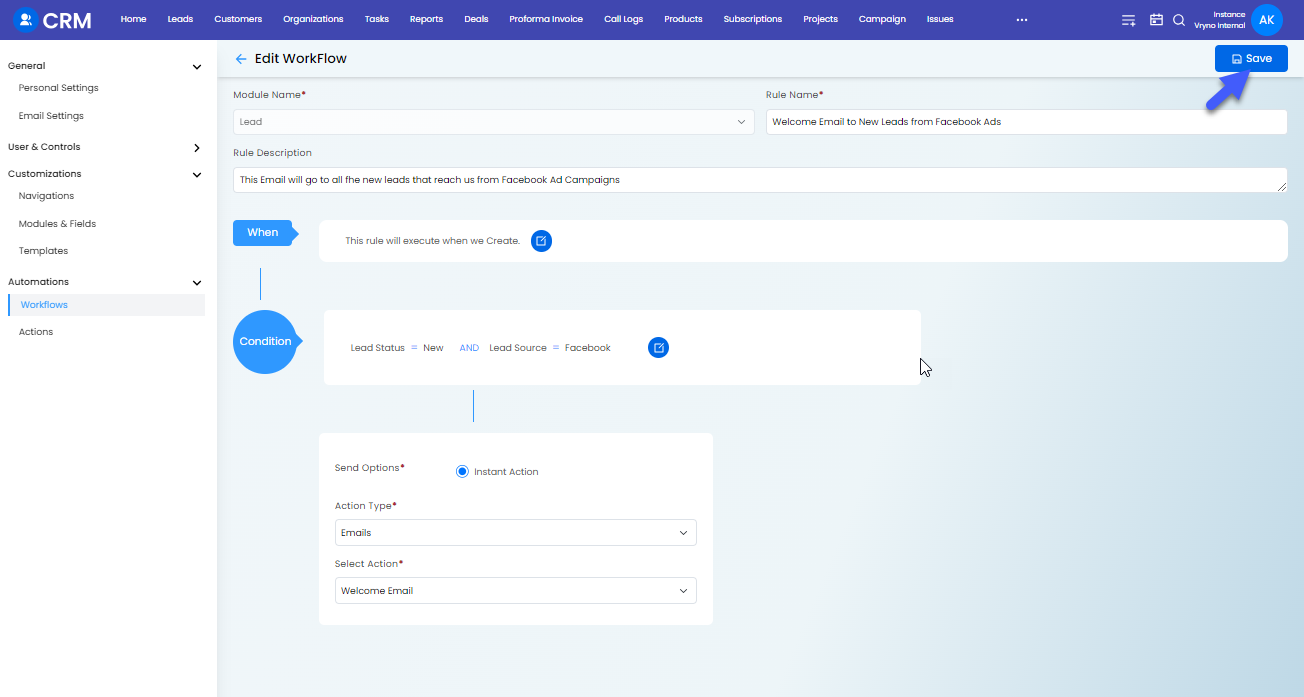
Step 4: Click on the Edit button next to the workflow you wish to edit

Step 5: Make the required changes and Click on Save
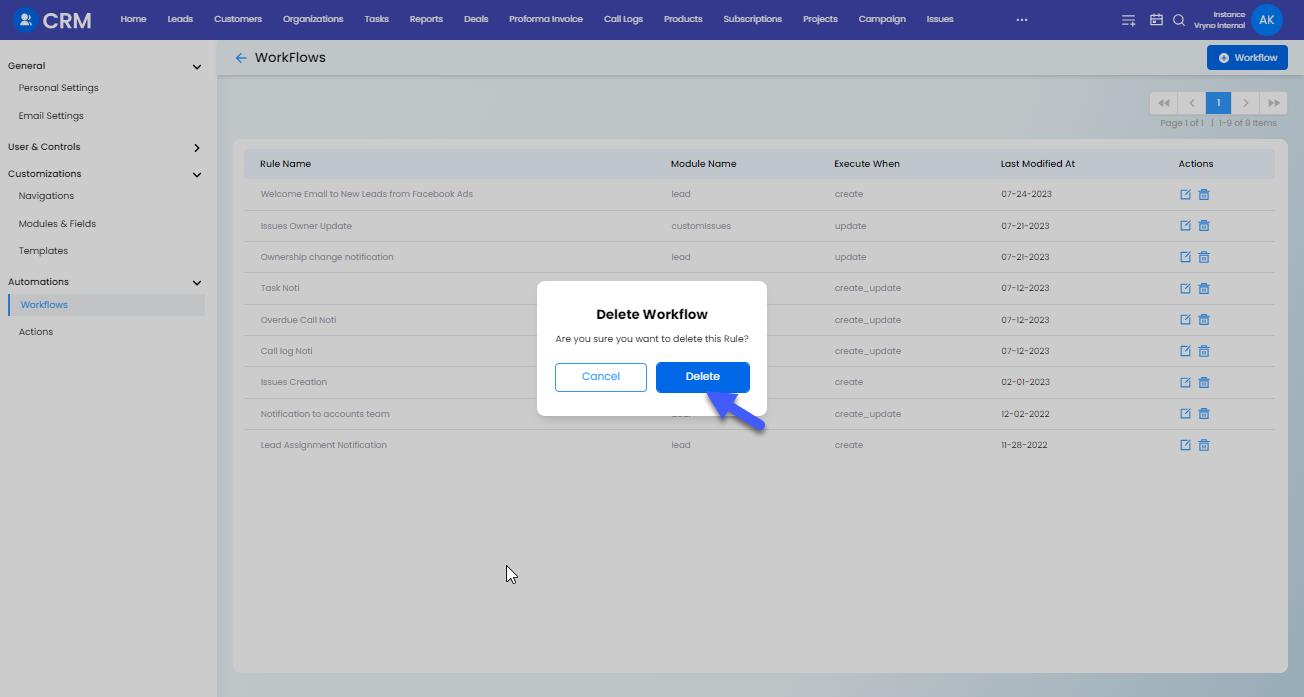
How to Delete Workflows in Vryno CRM?
Step 1: Login to your Vryno CRM account
Step 2: Click on your Profile and access Settings
Step 3: Access Automations & Click on Workflows
Step 4: Click on the Delete button next to the workflow you wish to delete
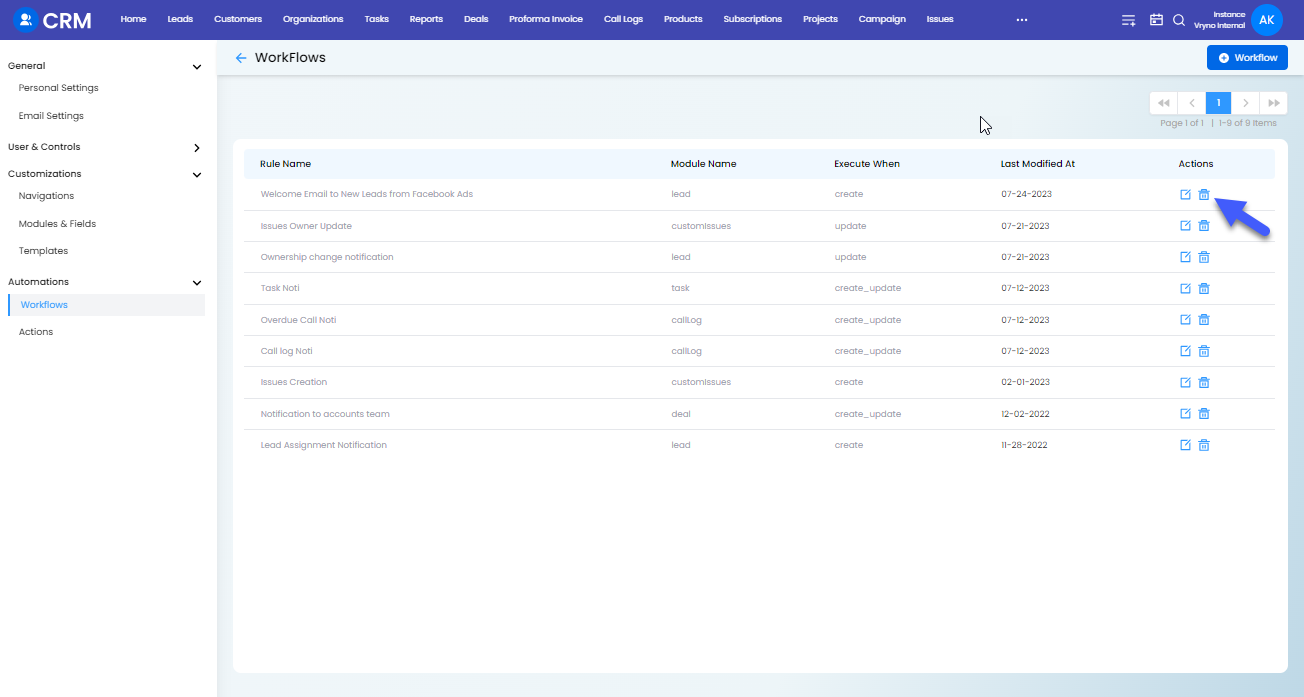
Step 5: Click on Delete again on the window that pops up to confirm deletion of the workflow
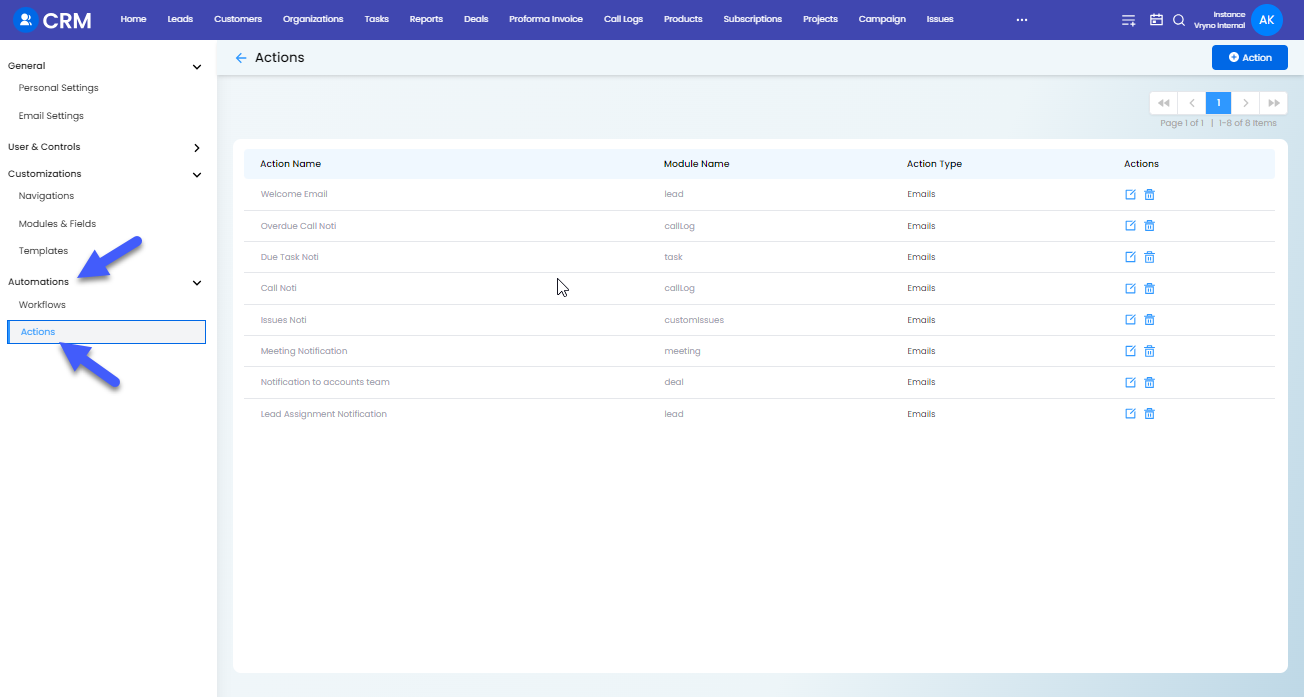
How to create Actions in Vryno CRM
Step 1: Login to your Vryno CRM account
Step 2: Click on your Profile and access Settings
Step 3: Access Automations & Click on Actions
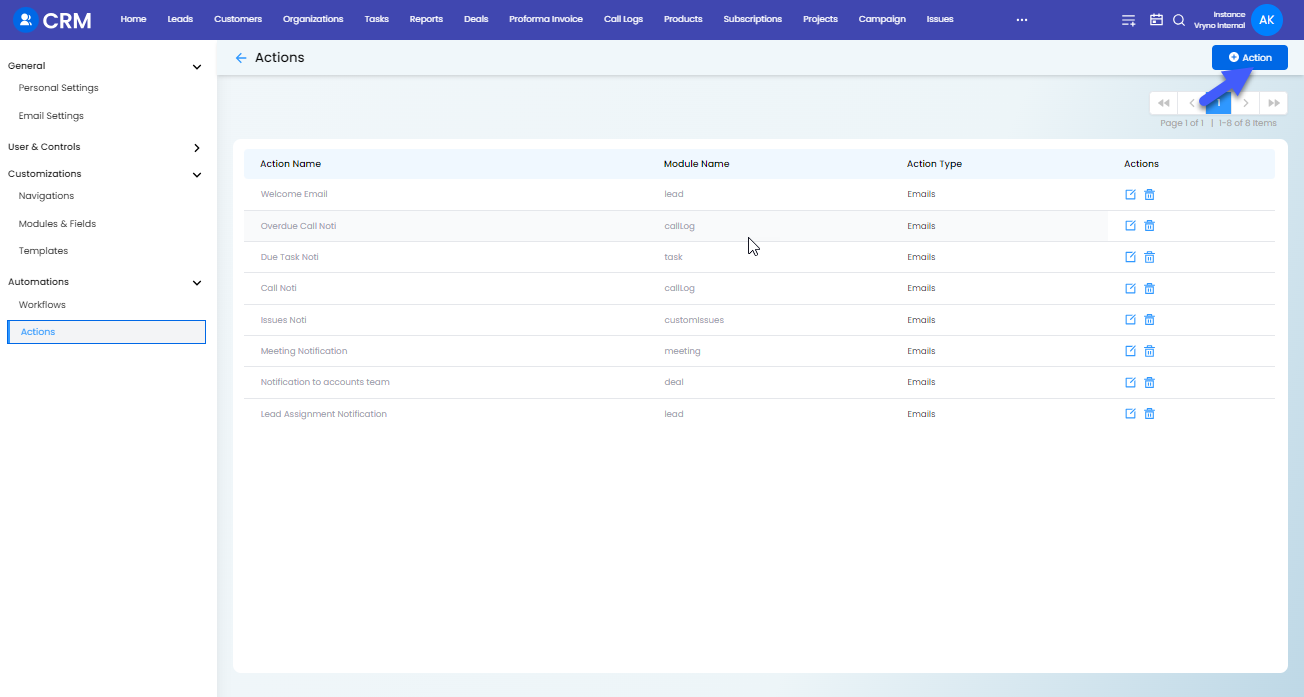
Step 4: Click on + Action button on the top right corner
Step 5: Enter the Action Name and choose the Action Type(Email or Webhooks)
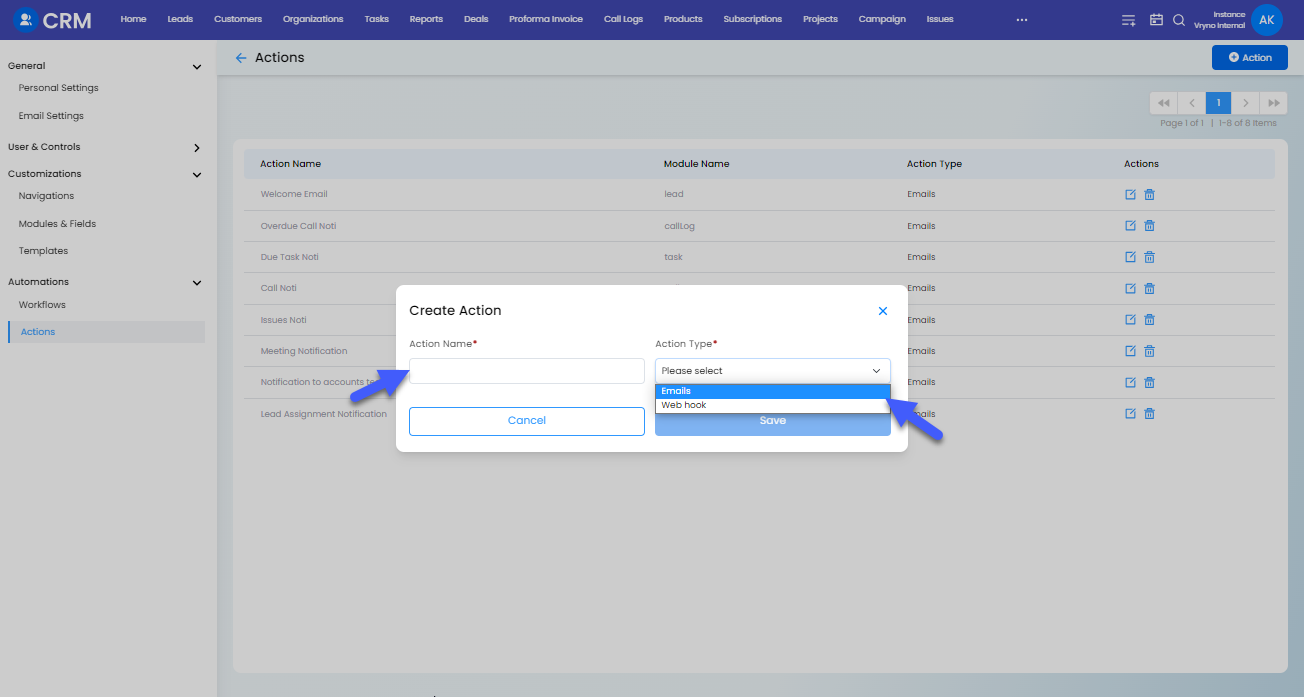
Step 5: Associate a Module with the Action
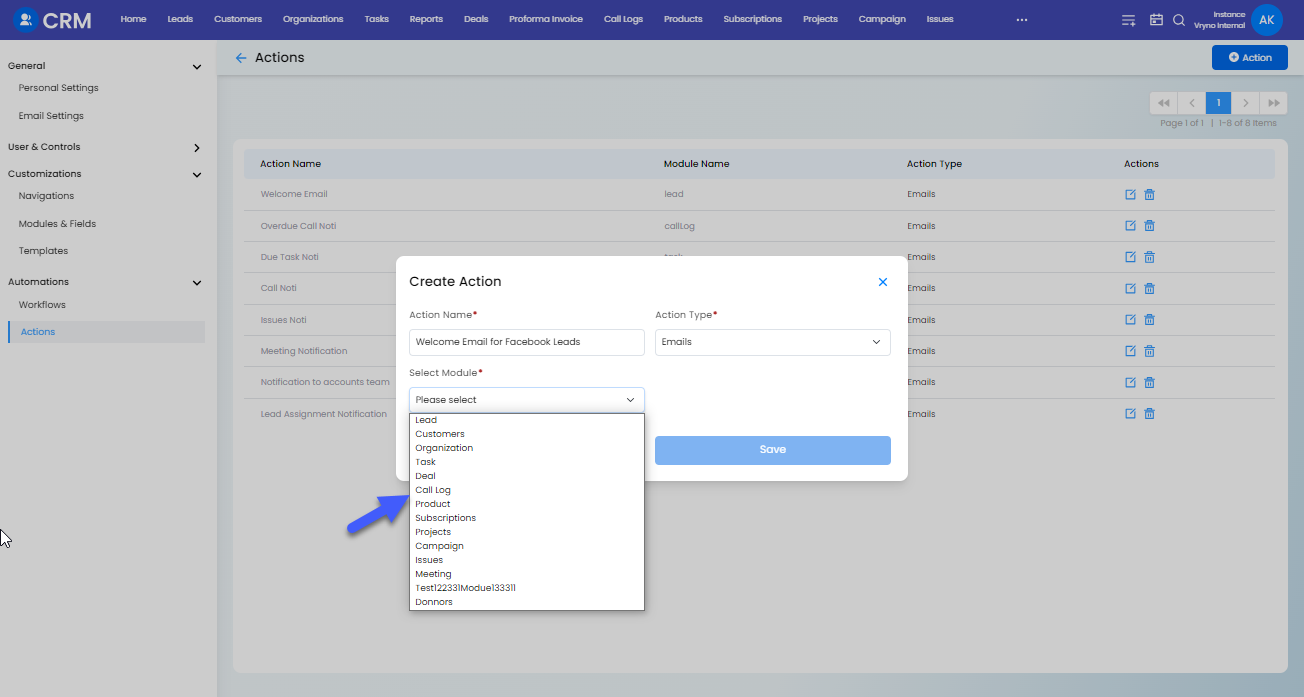
Step 6: Associate an Email Template with the Action
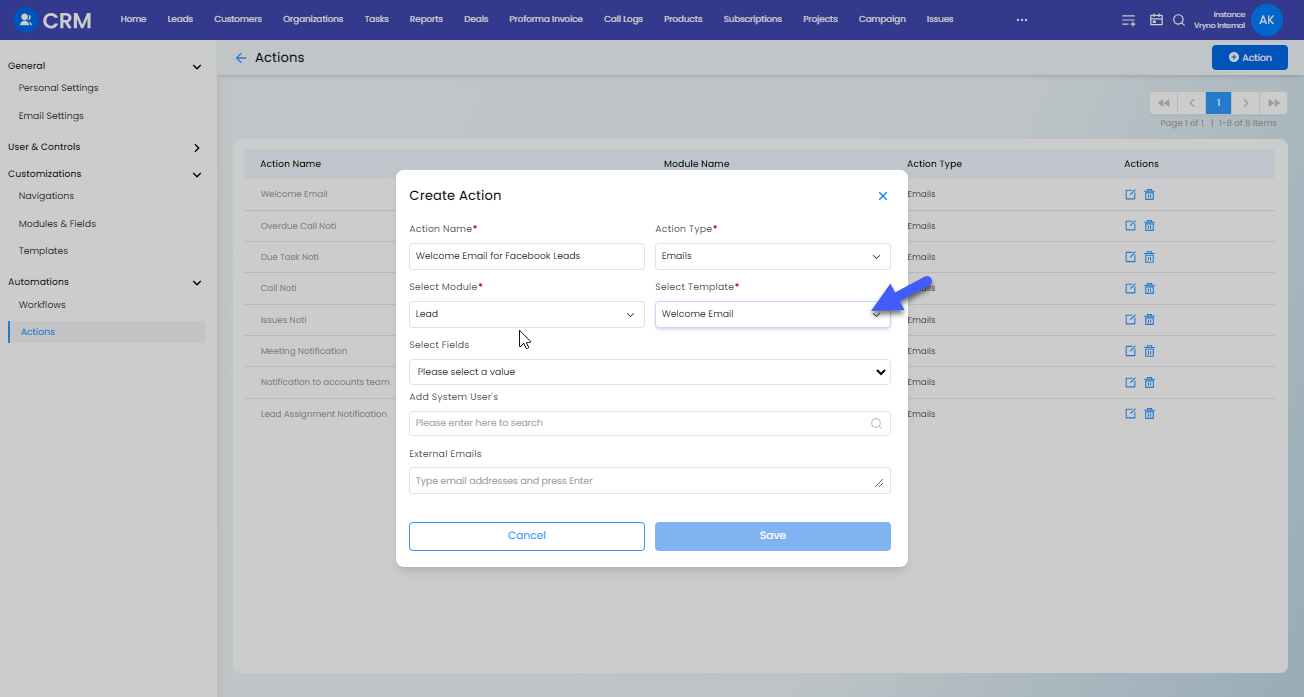
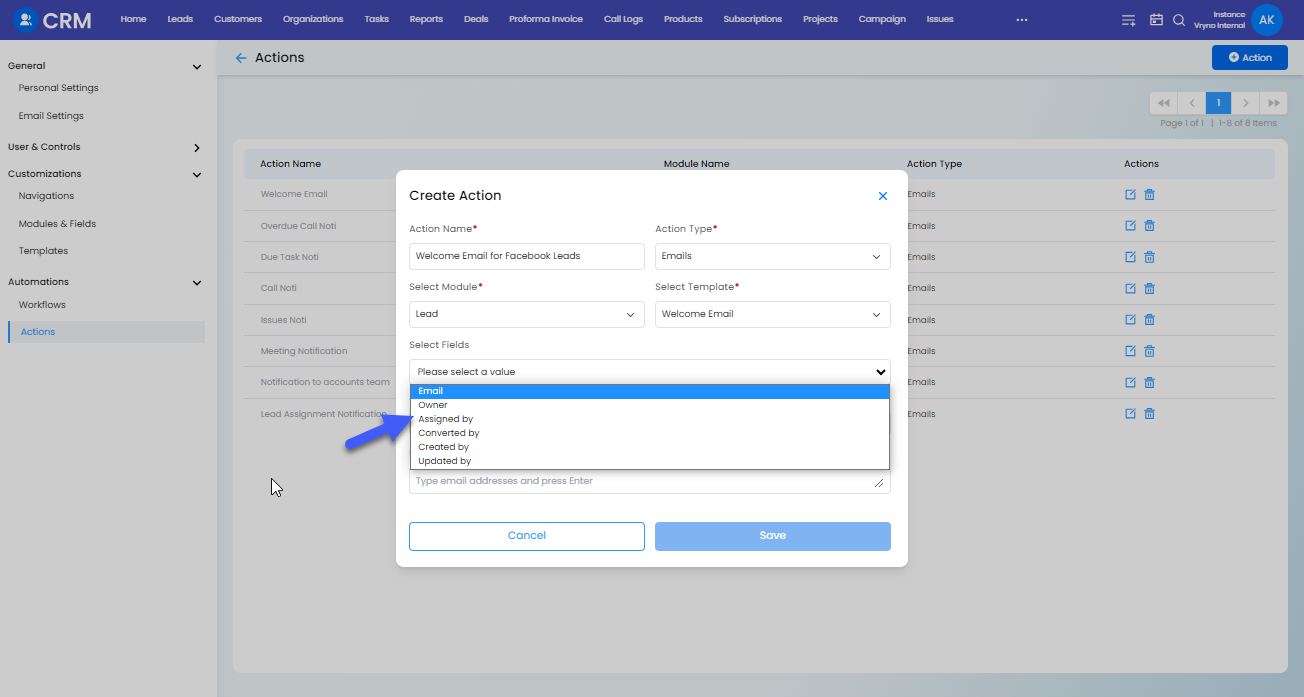
Step 7: Select the Email receipients from the record under the Select Fields section
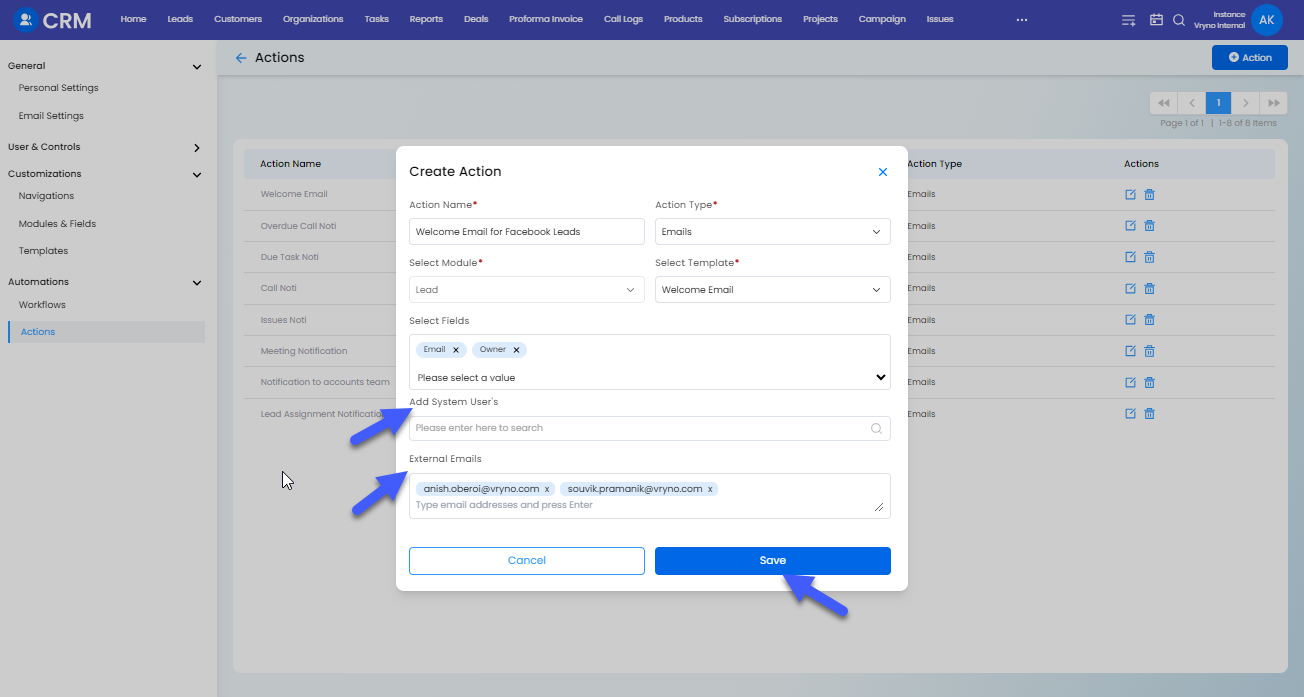
Step 8: Add System Users or External Email Addresses as Receipients and Save the action
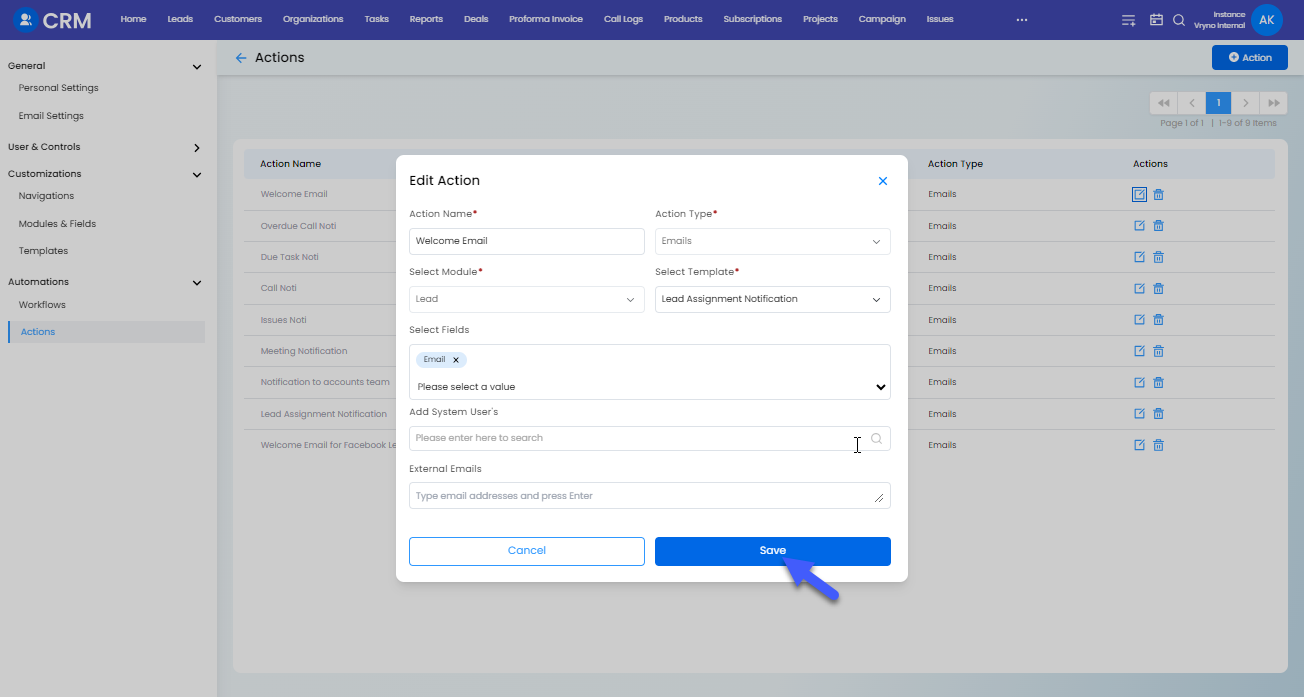
How to Edit Actions in Vryno CRM
Step 1: Login to your Vryno CRM account
Step 2: Click on your Profile and access Settings
Step 3: Access Automations & Click on Actions
Step 4: Click on the Edit button next to the action you wish to edit
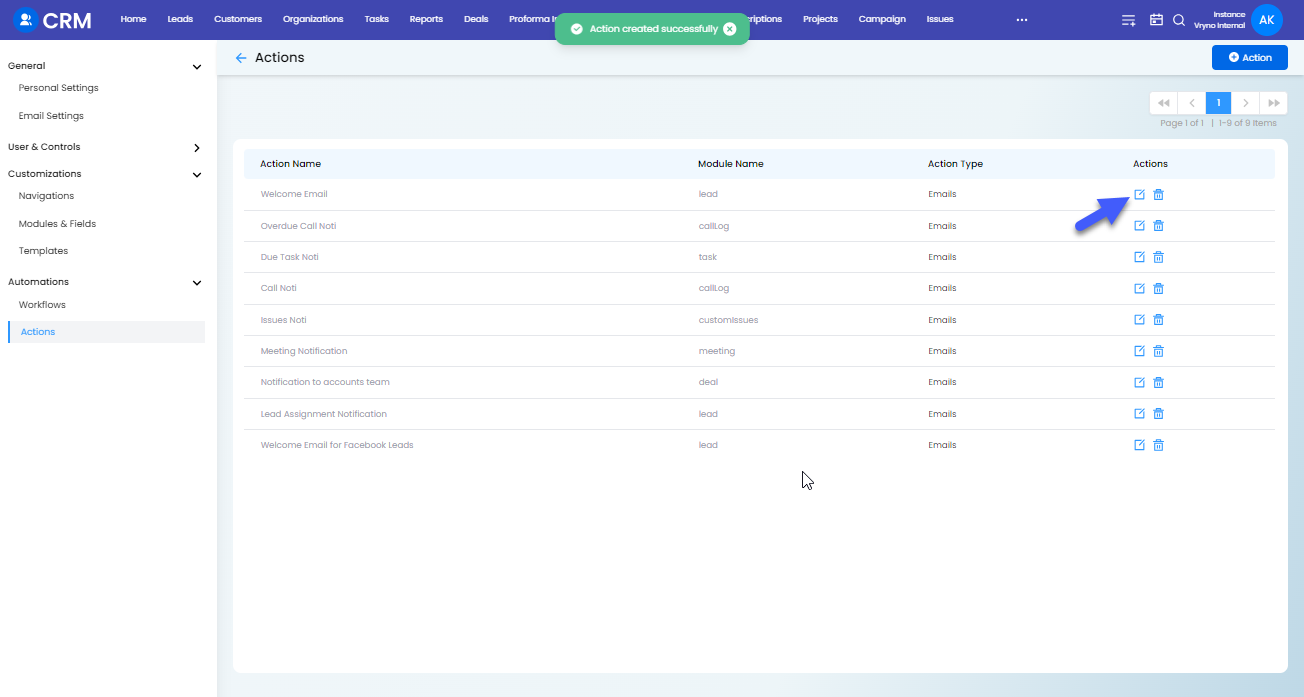
Step 5: Make the required changes and Click on Save
How to Delete Actions in Vryno CRM
Step 1: Login to your Vryno CRM account
Step 2: Click on your Profile and access Settings
Step 3: Access Automations & Click on Actions
Step 4: Click on the Delete button next to the action you wish to Delete
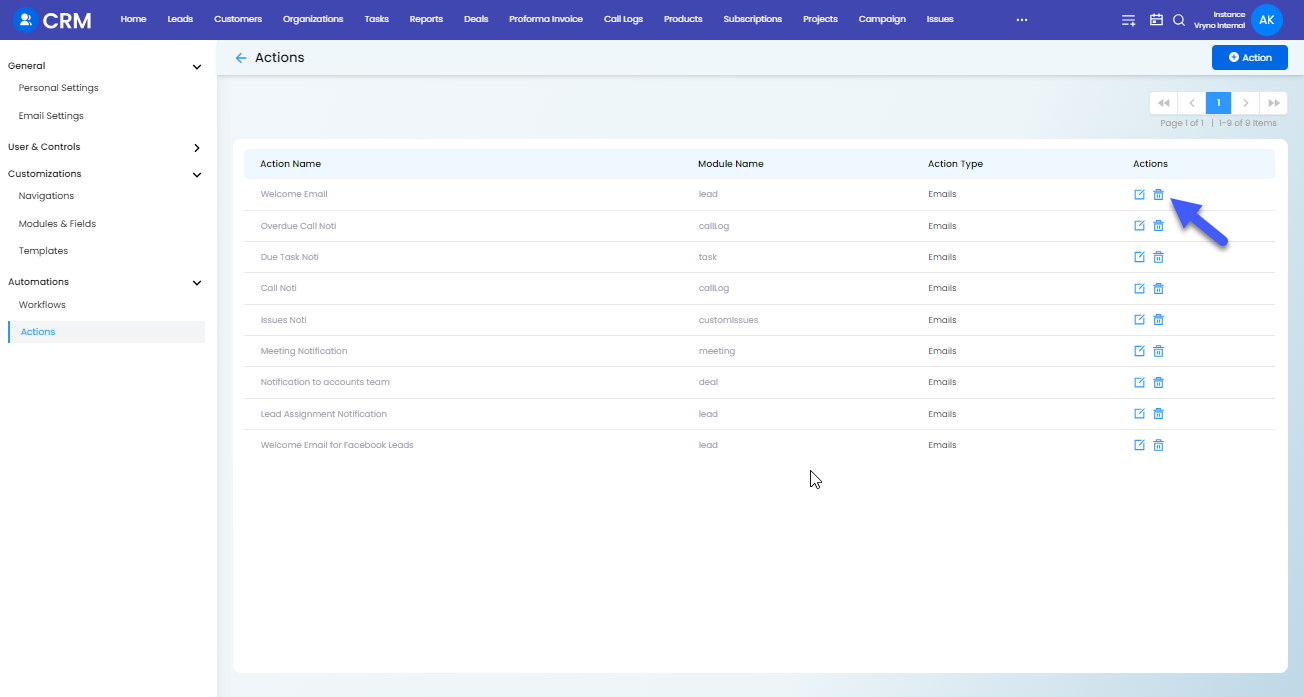
Step 5: Click on Delete again on the window that pops up to confirm deletion of action
