Configuring Calendar in Vryno CRM
Calendar & its uses in Vryno CRM
In Vryno CRM, the Calendar feature serves as a scheduling and time management tool. It allows users to create, view, and manage appointments, events, and tasks related to customers, leads, and other CRM entities.
Users can set reminders, schedule follow-ups, and track important dates for better customer engagement and efficient task management. The Calendar provides a holistic view of upcoming activities, ensuring timely communication with clients, and helping sales and support teams stay organized and productive.
How to access Calendar in Vryno CRM
Step 1: Login to Vryno CRM
-51f15d4e34dfd0c0734f76682923f25b.png)
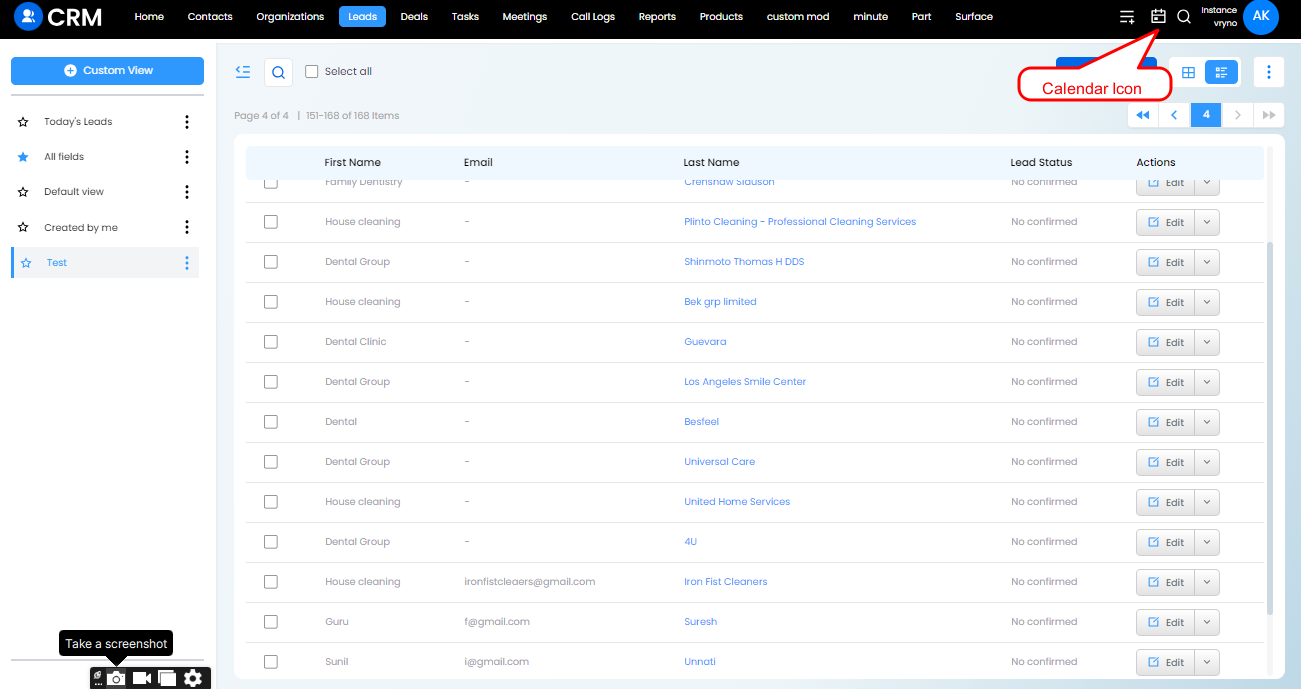
Step 2: Click on the Calendar Icon on the top right hand side as shown in the image below
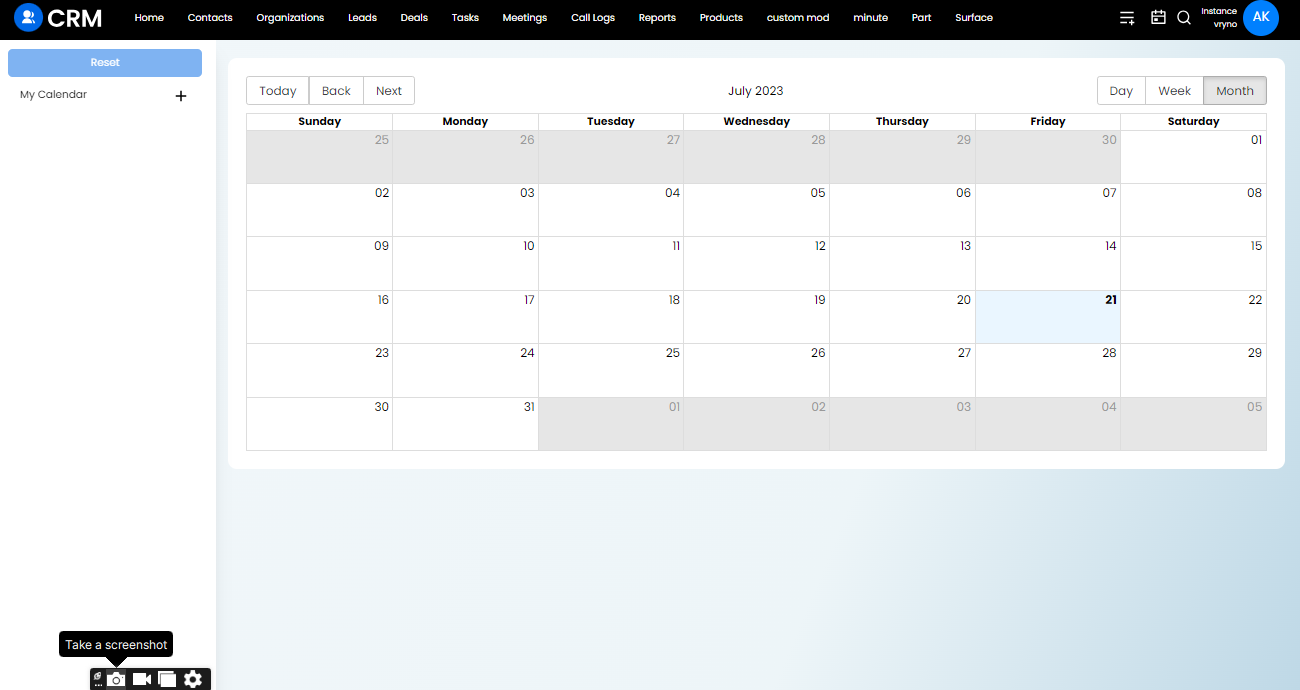
Step 3: Congrats! You've managed to access your Calendar on Vryno CRM
How to customize your Calendar in Vryno CRM
Step 1:
Step 2: Click on the Calendar Icon on the top right hand side as shown in the image below
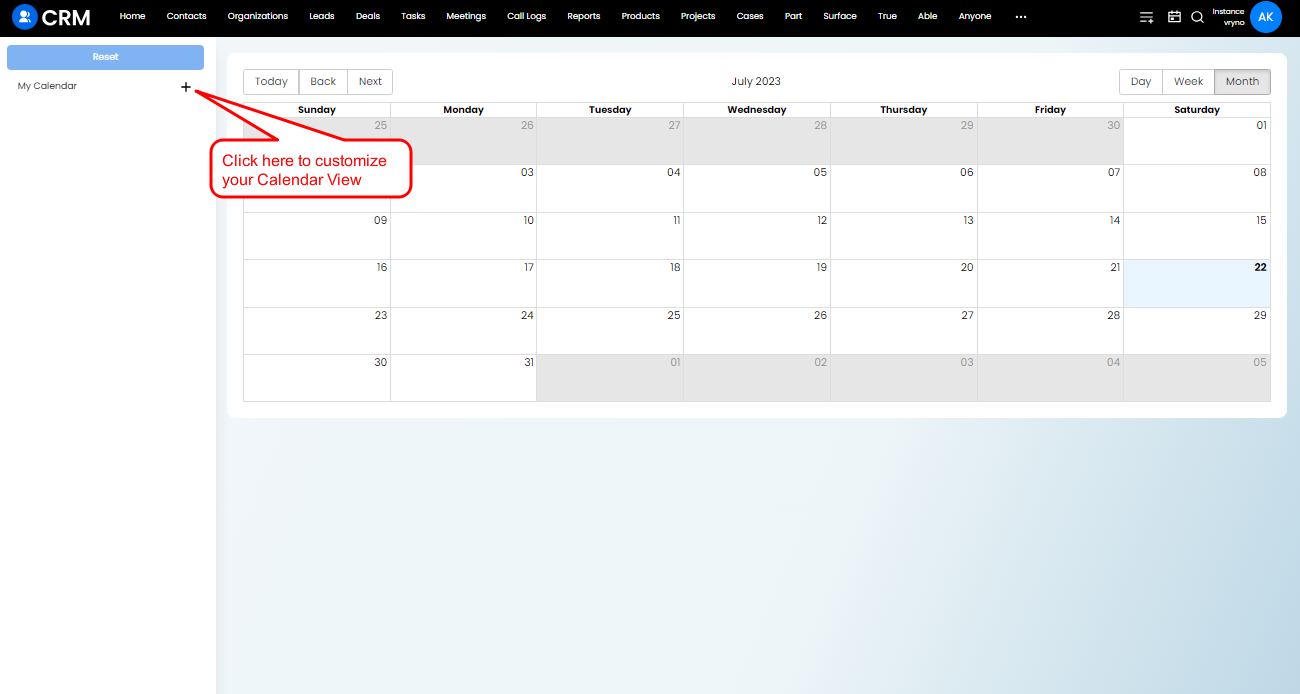
Step 3: Click on the + button next to My Calendar to add components to your calendar
You can use any Date or Date & Time field while customizing your calendar. Lets understand this by taking these field types as examples accross modules in Vryno CRM
- Leads Module: Next Follow-up Date, Last Contacted At, etc
- Contacts Module: Last Order On, Expected Upcoming Order Date, Date of Birth, etc
- Organizations Module: Last Order On, Expected Upcoming Order Date, Next Follow-up Date, etc
- Deals Module: Closing Date, Expected Closing Date, Created At, etc
- Calllog Module: Started At, Ended At, Reminder At, etc
- Meeting Module: Started At, Ended At, Reminder At, etc
- Task Module: Created At, Due Date, Start Date & Time, End Date & Time, Reminder, etc
- Products Module: Sales Start Date, Sales End Date, Support Start Date, Support End Date, etc
- Projects Module: Start Date, Target End Date, Actual End Date, etc
- Cases Module: Created At, Updated At, Closed At, etc
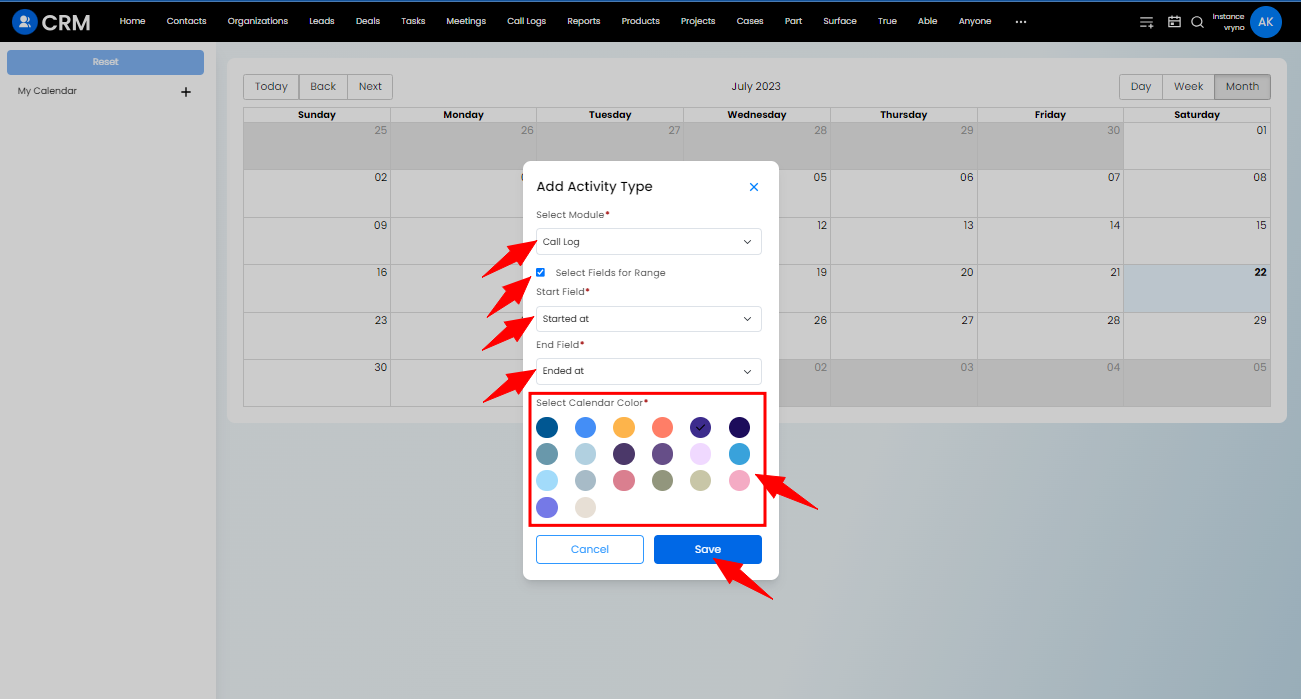
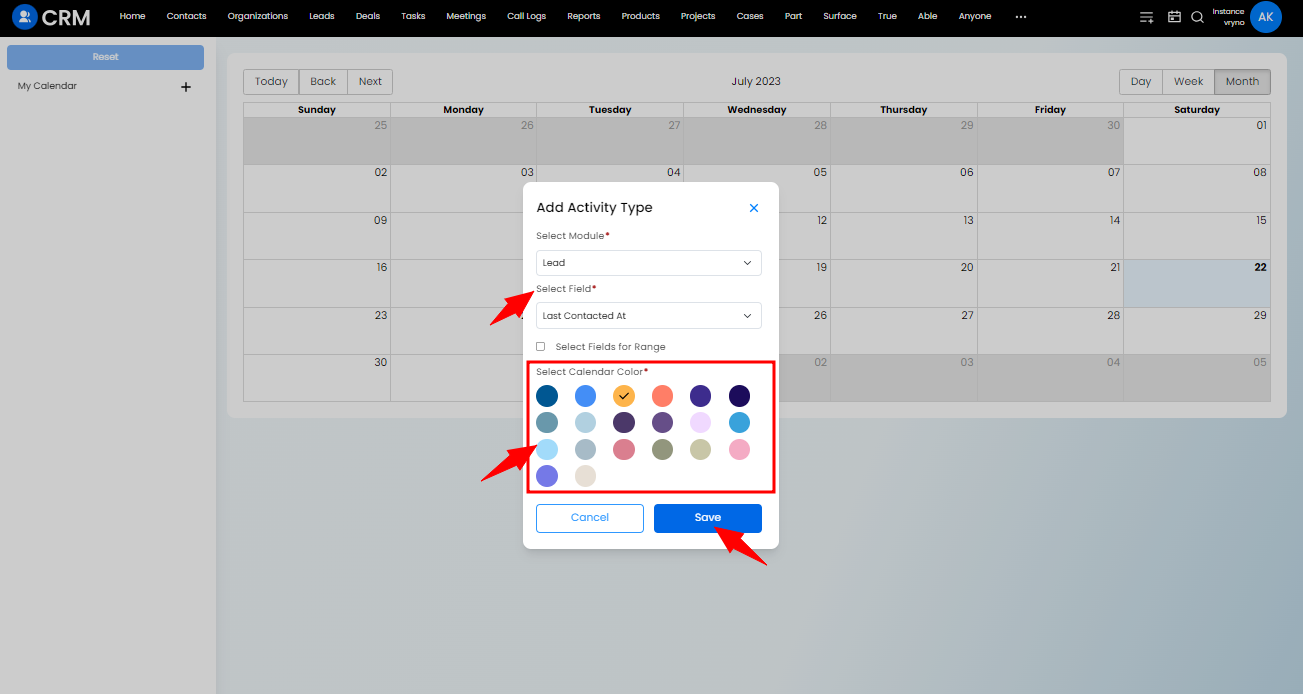
Step 4: In the form that pops up choose the Module from where you need to pick the Date/Date & Time Field from

Step 5: Now you need to make a decision if the Activity View you're creating for your Calendar is range based or not
a. For Activity Type that's not range based:
- Select the field you would like to choose as parameter
- Choose the Color for this activity type
- Click on Save
b. For Range based Activities:
- Tick the checkbox named Select Fields for Range if the Activity type is Range based (Eg: Start Time & End Time)
- Select the Start & End Date & Time fields
- Choose the Color for this activity type
- Click on Save